How to Make Alcohol Ink Rainbow Resin Coasters DIY!


This post may contain affiliate links, sponsored content and products received at no cost.
6:00 AM
The combination of resin and alcohol ink is a match made in heaven.   Learn how to make Alcohol Ink Rainbow Resin Coasters with just a few supplies and less than an hour.  Resin crafting is so much fun, if you haven't tried it yet--start with this project and blow everyone's mind!

How to Make Alcohol Ink Rainbow Resin Coasters DIY!


The combination of resin and alcohol ink is a match made in heaven!

Learn how to make Alcohol Ink Rainbow Resin Coasters with just a few supplies and less than an hour.

Resin crafting is so much fun, if you haven't tried it yet--start with this project and blow everyone's mind!


Alcohol Ink Art Rainbow Resin Coasters DIY! Alcohol inks are the newest and greatest art medium. These coasters are petrified rainbows, frozen in place as a glorious work of art. They are addictive to make, look great on a table and will protect the table from condensing drinks. They are magical and turn out as a surprise each time!

The inks dance and sink in the resin making the most interesting patterns. They are different every time, even if you drop the alcohol ink in them identically. It's like a Petri dish!


Alcohol inks are the newest and greatest art medium. 

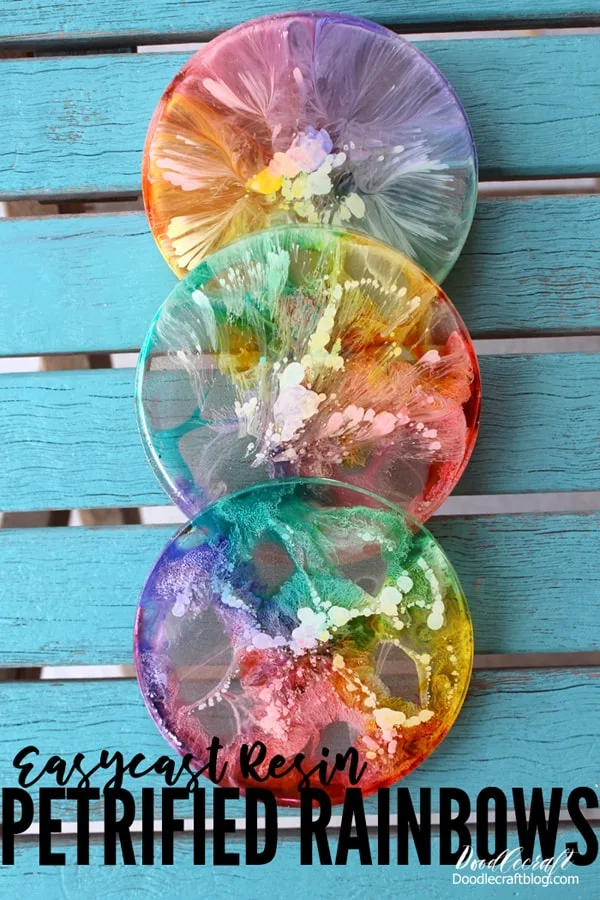
These coasters are petrified rainbows, frozen in place as a glorious work of art. 

They are addictive to make, look great on a table and will protect the table from condensing drinks.

They are magical and turn out as a surprise each time!

The inks dance and sink in the resin making the most interesting patterns. They are different every time, even if you drop the alcohol ink in them identically. It's like a Petri dish!

See the tiny details of the alcohol inks suspended in the resin.  It's almost like looking at images magnified in a microscope.


See the tiny details of the alcohol inks suspended in the resin.  It's almost like looking at images magnified in a microscope.

These are perfect for coasters or just art! The clear resin is the perfect canvas for the dancing of the alcohol inks.


These are perfect for coasters or just art! The clear resin is the perfect canvas for the dancing of the alcohol inks.

Supplies Needed:


Supplies Needed: Alcohol Inks Silicone Mold EasyCast Clear Casting Resin Resin mixing supplies (2 measured cups, stirring sticks, and gloves) Cardboard box that fits the molds.

Step 1: Small Layer of Resin


Begin by mixing the resin in the 2 phase process as instructed in the included instructions. Mix 6 ounces of resin, so 3 ounces each of the resin and hardener. If the resin is not mixed properly it may not set right, so take the time to make sure it's mixed correctly.


Step 1: Small Layer of Resin Begin by mixing the resin in the 2 phase process as instructed in the included instructions. Mix 6 ounces of resin, so 3 ounces each of the resin and hardener. If the resin is not mixed properly it may not set right, so take the time to make sure it's mixed correctly.

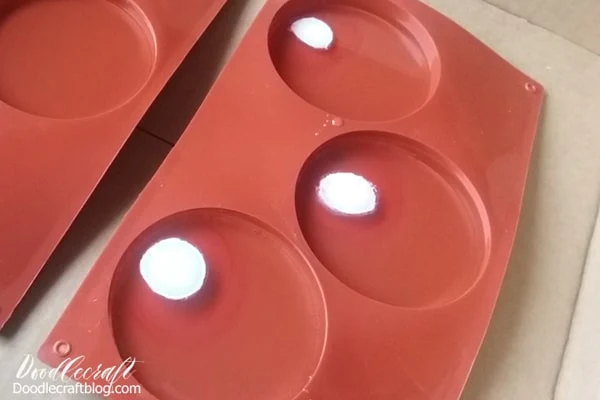
Pour one ounce of resin into each coaster opening on the mold. Use a heat gun or mini torch to pop any bubbles formed after 20 minutes...or gently blow through a straw near the bubbles. Then let the resin sit overnight to cure completely.


Step 2: Fill Coasters with Resin


Next day--or after about 4 hours, mix up more resin in the same process as before, but mixing up 12 ounces this time.  Then pour 2 ounces the resin in each coaster opening.  Pop the bubbles after 10 minutes, then start dropping alcohol inks right into the resin.


Step 2: Fill Coasters with Resin Next day--or after about 4 hours, mix up more resin in the same process as before, but mixing up 12 ounces this time.  Then pour 2 ounces the resin in each coaster opening.  Pop the bubbles after 10 minutes, then start dropping alcohol inks right into the resin.

Step 3: Drop Alcohol Inks


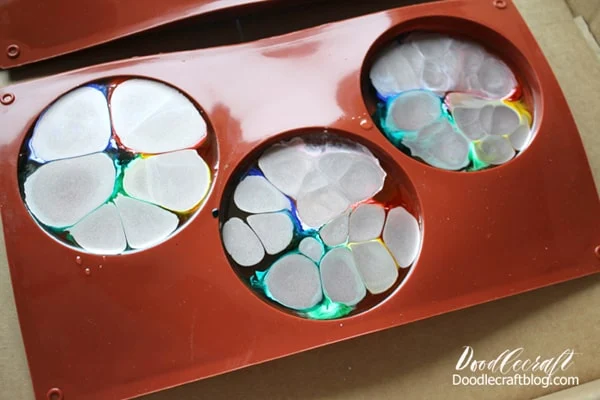
White and gold inks are the heaviest so they will sink to the bottom (becoming the top) easily. This will make the colors move. Add a drop of a color first, then one drop of white or gold on top of each color drop.


Step 3: Drop Alcohol Inks White and gold inks are the heaviest so they will sink to the bottom (becoming the top) easily. This will make the colors move. Add a drop of a color first, then one drop of white or gold on top of each color drop.

Experiment and play with the inks...dropping them in and alternating colors and topping them with white.  Add gold in between the colors.


Experiment and play with the inks...dropping them in and alternating colors and topping them with white.  Add gold in between the colors.

The inks swirl and dance.  It's fun to watch!


The inks swirl and dance.  It's fun to watch!

 The inks settle and move differently in each mold, so they all turn out differently.


The inks settle and move differently in each mold, so they all turn out differently.

I tend to add about 30-50 drops of ink in each mold. Then cover the molds with the lid of the box to prevent debris landing in the resin. 
Let them sit overnight. 
No need to worry about bubbles forming...I've never had an issue...and they would add to the overall effect.


I tend to add about 30-50 drops of ink in each mold. Then cover the molds with the lid of the box to prevent debris landing in the resin. Let them sit overnight. No need to worry about bubbles forming...I've never had an issue...and they would add to the overall effect.

Step 4: The Big Reveal


Next day, the reveal is the greatest moment!  Pull them out of the silicone molds.  You'll see a clear edge that is the first phase of the resin...and adds a nice touch.  You can just fill with resin and then drop inks, but I like to see the drops settle under the surface of the top layer of resin.


Step 4: The Big Reveal Next day, the reveal is the greatest moment!  Pull them out of the silicone molds.  You'll see a clear edge that is the first phase of the resin...and adds a nice touch.  You can just fill with resin and then drop inks, but I like to see the drops settle under the surface of the top layer of resin.

Look at the amazing intricacies of the alcohol inks.  It's amazing and super rewarding!


Look at the amazing intricacies of the alcohol inks.  It's amazing and super rewarding!

I wouldn't know how to duplicate any of the patterns I like...they just turn out random and beautiful.


I wouldn't know how to duplicate any of the patterns I like...they just turn out random and beautiful.

You can use whichever ink colors you like...making them specific for a theme or event.


You can use whichever ink colors you like...making them specific for a theme or event.

Each of these rainbow coasters were dropped in the same way--and look how different they turned out! The petrified rainbows are stunning! 

Alcohol inks and resin make the greatest combination!


Each of these rainbow coasters were dropped in the same way--and look how different they turned out! The petrified rainbows are stunning! Alcohol inks and resin make the greatest combination!


That's it!


Hope this gives you the inspiration and courage to give alcohol ink rainbow resin coasters a try!


Like, Pin and Share!


Learn how to make alcohol ink rainbow coasters with resin!


Check out more resin crafts here!


facebook Follow Me on Pinterest Youtube Instagram twitter
postscript

Comments

madeline said…
all of them are just so beautiful...i have been looking at all of the projects with the resin and they are so wonderful... i can remember using this is school but haven't done any since ...it was in grade school and i am 67 now so that tells you how many years ago...never even thought about being able to do them myself...thank you so much for sharing all of this ..i am ready now ...yayayaya...like these so much and you show how so well ...again thank you...
Unknown said…
Can this also be done with UV resin? Or just epoxy?
Doodlecraft said…
I think you should be able to use UV Resin for this technique, although I have not tried it. Start with just one and let me know how it turns out!
Unknown said…
If I do this with a classroom of 20 students, would one set of alcohol inks be enough? How much resin should I purchase? Thank you!
Doodlecraft said…
Sorry about the lengthy delay. Yes, one set of inks will be enough for 10 students. As for resin, these needed 3 ounces each, so enough for 60 ounces plus mistakes. :)