How to use the Card Making Mat with Cricut Joy!
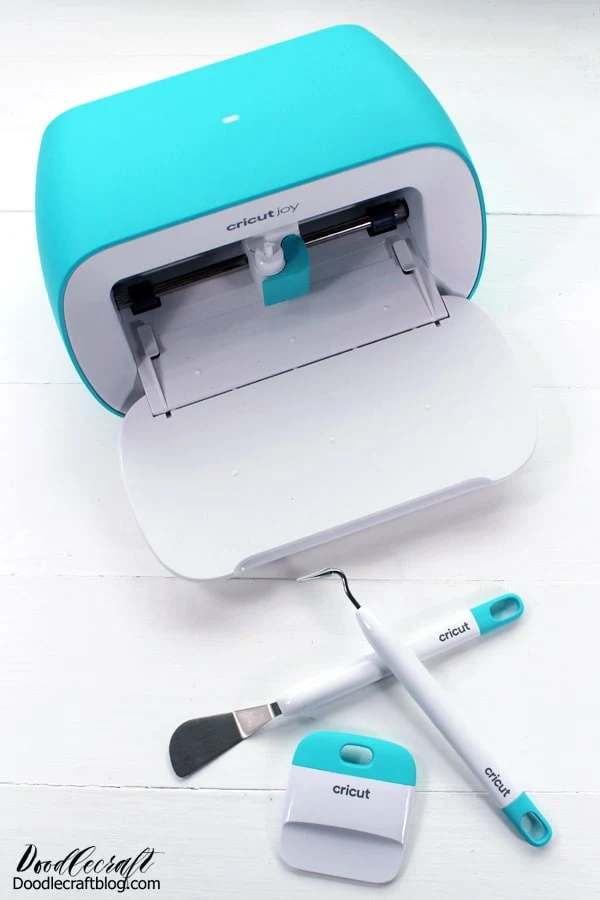
Have you discovered the joy of Cricut Joy yet? I love my tiny but powerful machine...and it's perfect to use during this social distancing time. This little device is perfect for the beginner to expert crafter. The best part is the Card Making Mat, it's dynamite!
Let me show you how easy it is to set up Cricut Joy and cut handmade cards using the Card Making mat.
Cricut sent me this machine as part of their blogger team. I am beyond thrilled and all opinions are mine. Affiliate links included.
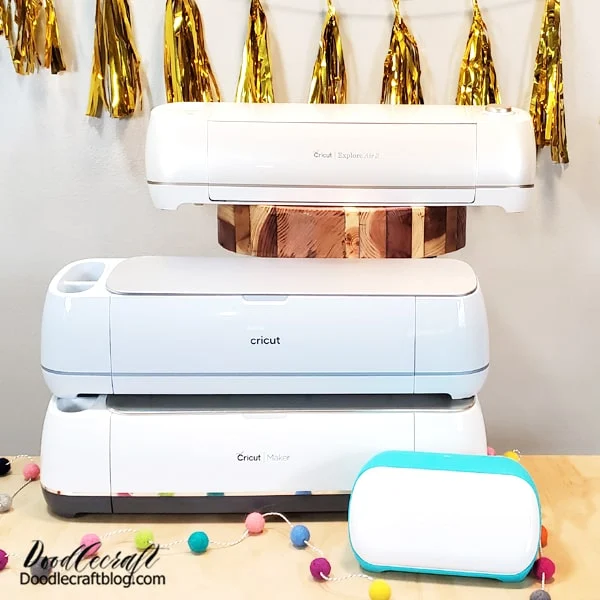
Cricut Joy measures 8x5x4 inches, so it slips into a cubby or stores easily when not in use.
Here's 5 Reasons to Get Cricut Joy:
Space Saving:
Takes up little space but still offers all the benefits of a cutting machine.
Costs less for machine and supplies, so it is much more budget friendly.
Take your Cricut Joy to events, classes or on the road.
No need to have a big computer or laptop! Just download the app and use bluetooth to run the device.
Cut a folded card without cutting through both layers of paper.
Cricut Joy has a full line of supplies for the machine. The cutting blade is smaller than the blade for the Maker or Explore Air 2, so it's not interchangeable. The vinyl is cut to size for the Joy. The Joy mats cut 4.5 inches wide and can even cut without a mat.
Long pieces of vinyl can be cut in 4 foot lengths, and can be repeated up to 20 feet long. This is much more than the Cricut Maker or Explore Air 2.
All the benefits of iron on vinyl, Infusible ink, vinyl, even printable vinyl for labels and stickers.
Let's get started with a perfect first project: How to use the Card Making Mat!
Step 1: Connect!
Plug in the machine. Enable bluetooth on your phone or device. Download the Cricut Design Space App.
It's so simple! Don't be intimidated, this machine is made to use!
Step 2: Image!
Begin by picking your card in Cricut Design Space. There are many that are FREE for use, some require additional purchases. I picked this tandem bike card, I love it. Follow the simple directions on your phone or device.
Remove the plastic cover over the Card Mat. Then insert the card into the mat and stick the top part down on the mat.
Insert the pen into Cricut Joy and press go.


Remove the plastic cover over the Card Mat. Then insert the card into the mat and stick the top part down on the mat.
Insert the pen into Cricut Joy and press go.
Step 3: Draw then Cut!
Then the device will let you know to replace the pen with the cutting blade. Then click go and it will cut out the design.
Step 4: Release Mat!
After the cutting is done, the device will prompt you to remove the mat. Go ahead and remove it.
Then peel up the card and throw away the little pieces that were cut out.
Step 5: Insert Paper!
Then place the iridescent or metallic paper insert inside the card to show through spectacularly! This is where the card really shines!
I love the iridescent paper shimmering through! This cute card was made in mere minutes, it's perfect for a get well, birthday, anniversary, wedding, or Spring greetings card.
Make a whole bunch to send out as needed...or just make them in a moments notice--it is so fast with Cricut Joy!
The card mat is my favorite feature about Cricut Joy!
Of course I love the portable size and my ability to take it to the local Girl Scouts troop or library class. I love it...plus it's so cute!
More Cricut Details:
Here's the size comparison to the Cricut Maker and the Cricut Explore Air 2.
Even though I have the Cricut Maker, I can really see myself using Cricut Joy. It is so simple and doesn't require a lot of desk space, computer time or large supplies. I can just plug it in, connect and cut! It's perfect for beginner crafters and even the most advanced crafters.
That's it!
Like, Pin and Share!
Tell me in the comments what you think of Cricut Joy!
Getting started, which machine to buy, what to make, how to start a Cricut business, and much much more!
You can make money using the Cricut Joy too--just like the Explore Air 2...check out this post for ideas:


-min.jpg)


Comments