How to Make Giant Coffee Filter Flowers Hand Dyed DIY
Learn how to make giant coffee filter flowers that are hand dyed, the perfect DIY.
Make these diy coffee filter flowers for party decorations, backdrops, events, a baby shower, weddings, or just home decor!
Coffee filter crafts are an inexpensive craft and perfect for a fun Springtime project!
Easy Coffee Filter Flowers:
Bright colored giant flowers are my favorite!
I am super allergic to real flowers, so I can't have them in my house--seriously, I will come down with flu-like symptoms, it's so awful.
Instead, I make roses and flowers out of paper--this is my latest and most favorite!
Make a giant hand dyed coffee filter flower with just a couple of supplies.
This giant paper flower measures 16 inch square.
Paper roses are perfect for a single statement flower...or make a bunch for a flower wall display, perfect for parties, weddings, giant bouquets or other over-the-top events!
This stunning flower has 115 coffee filters, dyed by hand with bright vivid colors, in fluffy light layers.
Paper flowers would make a great Mother's day gift too.
They use very simple supplies; basket coffee filters, some food colouring and a little drying and dying time.
I learned how to make three-dimensional flowers out of paper back in high school art class. It's a good craft project for older kids.
Let me show you how to make a stunning coffee filter flower.
If you make one, post it and tag me @doodlecraft. I'd love to cheer you on!
Then get creative and make coffee filter butterflies in the colorful flowers.
These watercolor coffee filter flowers have layers of coffee filters and a pop of color!
Supplies Needed for Giant Coffee Filter Flower:
- 115 Coffee Filters Per Flower
- Gel Food Coloring
- Water
- Stapler Pliers and staples
- Plate or a large container
- Wax Paper or Plastic Table Cloth
Follow along with these simple steps!
Step 1: Dying the Coffee Filters
Before starting the flowers--do the prep work, set up your work surface.
Place a piece of wax paper or plastic tablecloth over the table.
Begin by pouring about 1/8 cup of water on a shallow plate.
Add a half teaspoon of food coloring in your desired color--begin with a few drops of food coloring.
The more food coloring you use, the more vivid the color will be.
I used Gel Food Coloring and that did not fade as much as water based food coloring or washable markers.
Mix the water and coloring together.
Take a small stack of coffee filters and fold them in quarters and hold on the center of the filters.
Then dip the bottom of the filters into the colored water.
The coffee filters will soak up the food coloring.
Then lay the coffee filters on the wax paper or plastic tablecloth for drying.
Repeat for multiple colors. Let the coffee filters dry completely...about 8 hours or overnight.
Coffee Filter Flowers with Markers:
You can do this technique, although not quite as vibrant, with markers.
Get a handful of bright markers.
Place a coffee filter on a sheet of wax paper.
Color the coffee filter with colored markers...making scribbles or any design to achieve the desired effect.
Then spritz lightly with a spray bottle and watch the colors spread around like liquid watercolors.
Let them dry.
Step 2: Building the Coffee Filter Flower
Start to build the rose from the center out of the colored coffee filters.
Decide what color scheme you want your final piece to be and think of each section as a single rose petal.
Create the center:
Begin by layering yellows and oranges in a stack of 5 coffee filters then cut them in half.
For the first layer we just need a half circle to create the center of the flower.
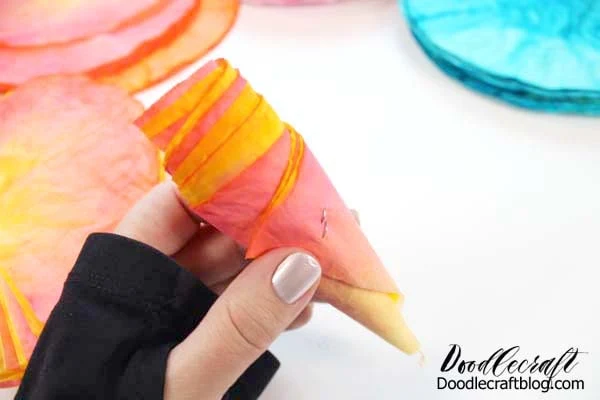
Staple the corner and roll the center pile in a cone shape, keeping the edge rolling across the curved part of the coffee filter for make petal shapes.
Then staple the cone right at the very bottom to hold the center together.
You could use hot glue but it would take a bit longer and I wouldn't do it that way with kids.
There may be other ways to make easy coffee filter flowers with floral wire or pipe cleaner or even wooden skewers.
Build the Petals of the Rose:
Now build the petals of the rose by stacking 5 coffee filters and folding them half.
Then place the rose center on the petal (folded coffee filters).
Roll up the flower petals around the base of the flower center and staple together.
Repeat the process with another stack of filters folded in half rather than cut this time.
This second set will overlap slightly around itself after wrapping and stapling.
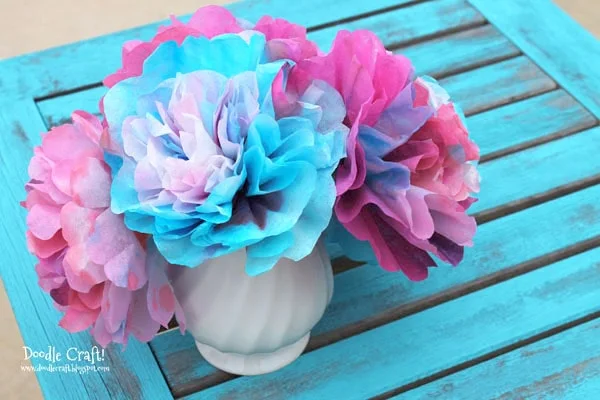
Small flowers could be made with just a few rows after the first layer and they would fit on a wooden dowel or green fuzzy sticks really nicely.
You could make a full bouquet...or do what I did and make large flowers!
Make Beautiful Flowers Bigger:
Repeat the process for the additional petal layers.
The center will get bigger and bigger, making the petals fit differently.
Just staple them on the sides and then wrap and staple the other side.
Watching the rose bloom is so rewarding!
If you are making a photo backdrop or a bouquet, make roses of all different colors and sizes.
You could also use fewer coffee filters or make a different type of coffee filter flower--get creative!
Layer in new colors of dyed filters to add dimension and variety.
Continue to staple petals around the rose.
I begin with the pinks, reds and oranges and then finished off my rose with teals and greens.
Decide how you want your rose to look and go for it!
You could do the same technique with layers of tissue paper if you need to book low-mess crafts for a classroom activity.
I love the fluffy layers of coffee filters on this rose.
This is my favorite time of the year to make gorgeous coffee filter flowers.
Build up the petals on the previous petals until you are satisfied with the size.
My rose is 16 inches square and about 6 inches tall.
I love it! It used 115 coffee filters.
It would look absolutely stunning in all white...or with gold painted edges!
Here's the backside of the rose, you can see how the petals build up on the previous ones.
The petals make it easy to hang up the rose on a command hook.
I love the watercolor look of the petals.
This size of coffee filter flower would be a little too big for craft sticks and floral tape...but you can scale them down to your desired size and create your own flowers for a bouquet or backdrop.
I absolutely love how this flower turned out!
It's so fun to finish that last step and enjoy the masterpiece.
You can attach a piece of wire to the back for easy hanging as well.
Sadly, I ran out of coffee filters and couldn't make more.
But I love how this turned out!
I'm planning on doing a bunch in white for a classy backdrop too--I need an industrial size package of coffee filters!
Now make a wall full of fluffy, brightly colored coffee filter roses!
That's it!
Hope you like fun flower crafts and enjoyed this giant one using coffee filters.
It's easy and inexpensive to make.
They are perfect for a lush, layered statement piece--home decor or party decorations.
Once you make one, you'll want to make more!
Like, Pin and Share!


-min.jpg)


Comments