How to Make Handmade Cards Three Easy Ways!


This post may contain affiliate links, sponsored content and products received at no cost.
6:00 AM
I began my adventure in blogging and crafting by making handmade cards. It’s the perfect craft to make and send to friends to bring a smile to their face. Make a few to keep on hand and use when the opportunity arises. Here’s everything you need to know about getting started making handmade cards.

How to Make Handmade Cards Three Easy Ways!


I began my adventure in blogging and crafting by making handmade cards. It’s the perfect craft to make and send to friends to bring a smile to their face. 

Make a few to keep on hand and use when the opportunity arises. Here’s everything you need to know about getting started making handmade cards.


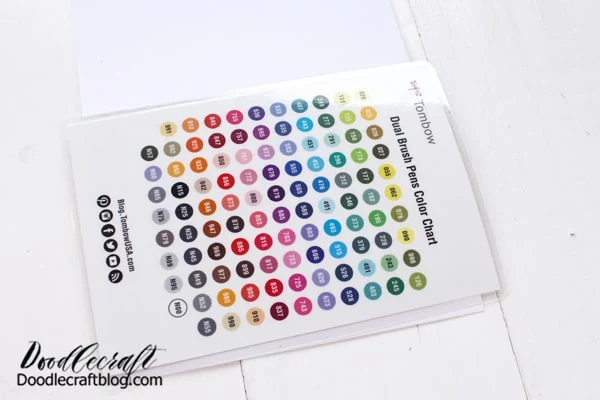
Supplies Needed for Basic Handmade Cards: White cardstock  Paper cutter or trimmer  Score board or ruler and stylus  ABT Pro Alcohol Ink Markers  Dual Brush Pens  MONO Drawing Pens  MONO Permanent Adhesive  TwinTone Markers  MONOTWIN Permanent Marker  Irojiten Colored Pencils  Fudenosuke Brush Pens  Foam Tape

Supplies Needed for Basic Handmade Cards:


How to make Handmade card three easy ways!

Step 1: Cut and Score Blank Cards


Begin by cutting a standard piece of paper in half. Then score the pieces in half with a score board or with a ruler and stylus.


Step 1: Cut and Score Blank Cards Begin by cutting a standard piece of paper in half. Then score the pieces in half with a score board or with a ruler and stylus.

Step 2: Create a Background


Make a background on the paper using whichever Tombow products you desire.


Step 2: Create a Background Make a background on the paper using whichever Tombow products you desire.

Option 1: Watercolor Wash Background

Supplies Needed:

  • Tombow Dual Brush Pens
  • Folded card
  • Tombow Blending Palette
  • Spray Bottle
  • Fudenosuke Black Pen

Option 1: Watercolor Wash Background Supplies Needed: Tombow Dual Brush Pens  Folded card  Tombow Blending Palette  Spray Bottle  Fudenosuke Black Pen

Start by scribbling the Dual Brush Pens on the Blending Palette.


Start by scribbling the Dual Brush Pens on the Blending Palette.

Next, spritz the Blending Palette with the Spray Bottle.


Then, spritz the Blending Palette with the Spray Bottle.

Then, place the Blending Palette on the card and press gently.


Then, place the Blending Palette on the card and press gently.

Remove the blending palette and let the card background dry.


Remove the blending palette and let the card background dry.

Part 2:

Begin by cutting a small piece of cardstock and hand letter the sentiment on the paper. 

Then, use the Tombow Foam Tape and add a strip to the back of the sentiment.


Begin by cutting a small piece of cardstock and hand letter the sentiment on the paper. Then, use the Tombow Foam Tape and add a strip to the back of the sentiment.

Then, adhere the sentiment to the card. This is a helpful technique if there’s a mistake on the background that needs covering or balance. 

See how great this card looks with the text!?


Then, adhere the sentiment to the card. This is a helpful technique if there’s a mistake on the background that needs covering or balance. See how great this card looks with the text!?

Option 2: ABT PRO Marker Design

Supplies Needed:

  • Tombow ABT PRO Alcohol Ink Markers
  • Folded card
  • Fudenosuke Black Pen
  • MONO Drawing Pens

Begin by coloring random shapes on the front face of the card using the ABT PRO Alcohol-Based Markers.


Option 2: ABT PRO Marker Design Supplies Needed: Tombow ABT PRO Alcohol Ink Markers  Folded card  Fudenosuke Black Pen  MONO Drawing Pens    Begin by coloring random shapes on the front face of the card using the ABT PRO Alcohol-Based Markers.

Then, use MONO Drawing Pen 03 to doodle little shapes and patterns around the colored shapes.


Then, use MONO Drawing Pen 03 to doodle little shapes and patterns around the colored shapes.

Finally, use the Fudenosuke Brush Pen to write a sentiment on the card. This is a great finished card that mails easily with no extra effort. 

Make a bunch and then letter the sentiment as needed.


Use the Fudenosuke Brush Pen to write a sentiment on the card. This is a great finished card that mails easily with no extra effort. Make a bunch and then letter the sentiment as needed.

Option 3: TwinTone Pattern Background

Supplies Needed:

  • Tombow TwinTone Markers
  • Folded card
  • Foam Tape
  • MONO Adhesive
  • Fudenosuke Pen

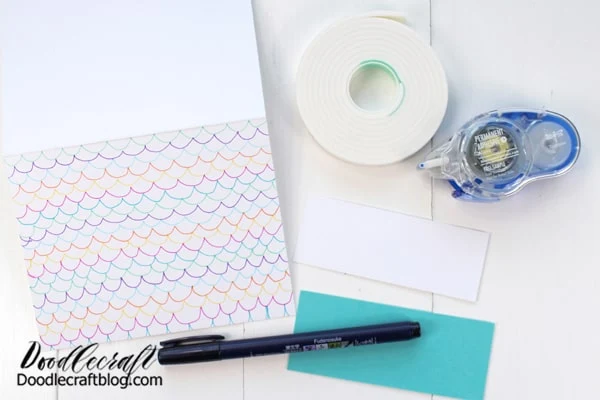
Begin by drawing a scallop pattern across the top of the front of the card. Repeat the pattern with alternating TwinTone Marker colors. 

Use a ruler and draw geometric patterns, lines or other doodles on the card.


Option 3: TwinTone Pattern Background Supplies Needed: Tombow TwinTone Markers  Folded card  Foam Tape  MONO Adhesive  Fudenosuke Pen    Begin by drawing a scallop pattern across the top of the front of the card. Repeat the pattern with alternating TwinTone Marker colors. Use a ruler and draw geometric patterns, lines or other doodles on the card.

Lastly, this option is my favorite. Cut a piece of colored paper 1/4 inch larger than a piece of white cardstock. Hand letter a sentiment on the white cardstock. 

Use the MONO Permanent Adhesive to adhere the white cardstock to the colored paper, leaving a small border around the edge.


Lastly, this option is my favorite. Cut a piece of colored paper 1/4 inch larger than a piece of white cardstock. Hand letter a sentiment on the white cardstock. Use the MONO Permanent Adhesive to adhere the white cardstock to the colored paper, leaving a small border around the edge.

Then, use the Foam Tape to adhere the sentiment to the card.


Then, use the Foam Tape to adhere the sentiment to the card.

Place the sentiment anywhere on the card. This Foam Tape is still perfect to send through the mail. There is no extra postage needed.


Place the sentiment anywhere on the card. This Foam Tape is still perfect to send through the mail. There is no extra postage needed.

Finally, add any embellishments that you like. Adding embellishments will make the card trickier to mail through the standard post. 

Just take it to the post office and they’ll do the rest. These embellished cards are great to deliver to neighbors, on a gift or to pass in person without worrying about postage.


Finally, add any embellishments that you like. Adding embellishments will make the card trickier to mail through the standard post. Just take it to the post office and they’ll do the rest. These embellished cards are great to deliver to neighbors, on a gift or to pass in person without worrying about postage.

Before you know it, you’ll be making cards for every occasion! I love making handmade cards. 

Now, I give packages of blank handmade cards as gifts too.


How to Make Handmade Cards Three Easy Ways! Papercrafting is a great hobby to start. 

Make cute cards to brighten the day of others and send them for a perfect social distancing hello.


Before you know it, you’ll be making cards for every occasion! I love making handmade cards. Now, I give packages of blank handmade cards as gifts too.

That's it!

Like, Pin and Share!


How to Make Handmade Cards Three Easy Ways! Papercrafting is a great hobby to start. Make cute cards to brighten the day of others and send them for a perfect social distancing hello.


facebook Follow Me on Pinterest Youtube Instagram twitter
postscript

Comments