How to Cast Skeleton Key in Clear Resin


This post may contain affiliate links, sponsored content and products received at no cost.
6:00 AM
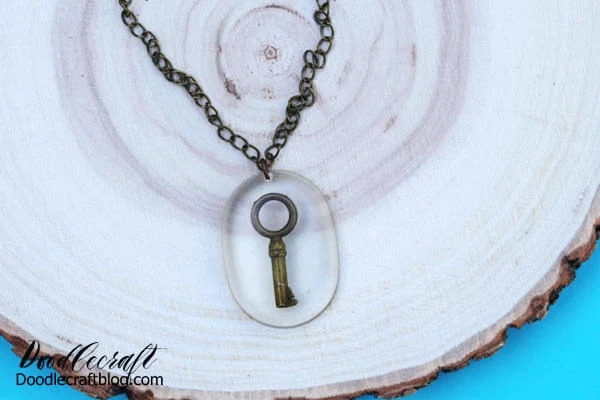
How to Cast Skeleton Key in Clear Resin Skeleton keys are my favorite, they remind me of secret doors. Create an amazing skeleton key necklace with resin for an especially fun steampunk flare accessory. This project takes just a few supplies and a little time. Let’s get started!

How to Cast Skeleton Key in Clear Resin

Skeleton keys are my favorite, they remind me of secret doors. Create an amazing skeleton key necklace with resin for an especially fun steampunk flare accessory. This project takes just a few supplies and a little time. Let’s get started!

How to Cast Skeleton Key in Clear Resin Skeleton keys are my favorite, they remind me of secret doors. Create an amazing skeleton key necklace with resin for an especially fun steampunk flare accessory. This project takes just a few supplies and a little time. Let’s get started!

This fun skeleton key necklace would make a great gift or a great addition to a Halloween costume.

This fun skeleton key necklace would make a great gift or a great addition to a Halloween costume.

SUPPLIES NEEDED:

Mixing Cups, Stirring Sticks, Disposable Gloves
Drill and Bit
Jump Ring, chain and jewelry pliers

SUPPLIES NEEDED: Enviortex Jewelry Resin Resin Mold Skeleton Key Heat Gun or Mini Torch Mixing Cups, Stirring Sticks, Disposable Gloves Drill and Bit Jump Ring, chain and jewelry pliers

Begin by mixing the resin according to the package instructions in the 2 phase process. Mix just a small amount of resin, about 1 teaspoon of the resin and 1 teaspoon of hardener.

Begin by mixing the resin according to the package instructions in the 2 phase process. Mix just a small amount of resin, about 1 teaspoon of the resin and 1 teaspoon of hardener.

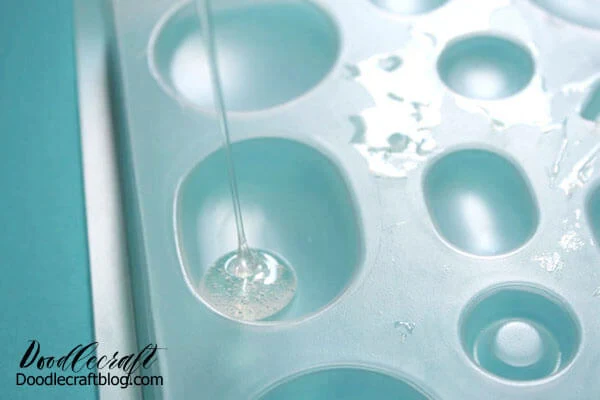
After mixing the resin, pour a small layer into the jewelry mold. 

After mixing the resin, pour a small layer into the jewelry mold.

Next, use a heat gun or torch to pop any of the bubbles that have formed. Then set the mold aside for about 2-3 hours.

Next, use a heat gun or torch to pop any of the bubbles that have formed. Then set the mold aside for about 2-3 hours.

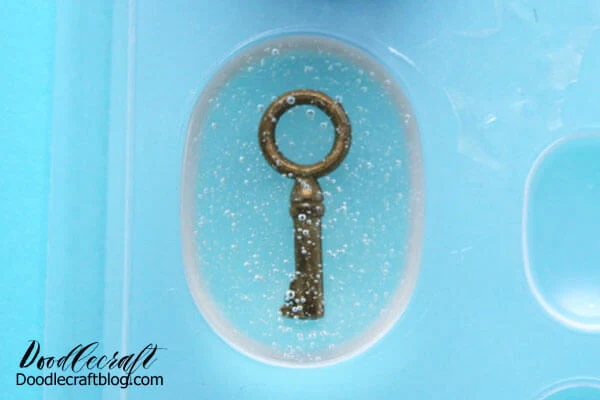
After a few hours the resin will have gelled enough to hold up the weight of the skeleton key without sinking to the bottom. Then place the key on top of the resin.

After a few hours the resin will have gelled enough to hold up the weight of the skeleton key without sinking to the bottom. Then place the key on top of the resin.

After a few hours the resin will have gelled enough to hold up the weight of the skeleton key without sinking to the bottom. 

After a few hours the resin will have gelled enough to hold up the weight of the skeleton key without sinking to the bottom.

Then place the key on top of the resin.

Then place the key on top of the resin.

Repeat the process for mixing up more resin, about double to triple the amount as earlier. Then pour the mixed resin right on top of the key until the mold is filled. Use the torch or heat gun to pop any formed bubbles then set aside overnight to cure.

Repeat the process for mixing up more resin, about double to triple the amount as earlier. Then pour the mixed resin right on top of the key until the mold is filled. Use the torch or heat gun to pop any formed bubbles then set aside overnight to cure.

The next day, simply pop the resin out of the mold. Then use the drill and bit to pilot a small hole in the top of the resin.

The next day, simply pop the resin out of the mold. Then use the drill and bit to pilot a small hole in the top of the resin.

Next use some jewelry pliers to slip a jump ring through the hole in the resin. Then slide the chain through the jump ring and attach the ends together (either with a second jump ring, or just by interlocking the chain ends).

Next use some jewelry pliers to slip a jump ring through the hole in the resin. Then slide the chain through the jump ring and attach the ends together (either with a second jump ring, or just by interlocking the chain ends).

Now the necklace is ready to wear! This would make a great addition to a Halloween costume, or just to wear daily. I love to see the key suspended in the resin, just floating there. The rounded dome surface of the resin creates a sort of magnifying glass that enlarges the appearance of the key. 

Now the necklace is ready to wear! This would make a great addition to a Halloween costume, or just to wear daily. I love to see the key suspended in the resin, just floating there. The rounded dome surface of the resin creates a sort of magnifying glass that enlarges the appearance of the key.

That's it!

Like, Pin and Share!

How to Cast Skeleton Key in Clear Resin Skeleton keys are my favorite, they remind me of secret doors. Create an amazing skeleton key necklace with resin for an especially fun steampunk flare accessory. This project takes just a few supplies and a little time. Let’s get started!


facebook Follow Me on Pinterest Youtube Instagram twitter
postscript

Comments