Hand Sewn Spider Halloween Decoration with Poly-Fil


This post may contain affiliate links, sponsored content and products received at no cost.
6:00 AM
Make a darling spider for the perfect Halloween decoration. This is a hand sewing project and perfect for beginners. This is how I learned to hand sew when I was about 7 years old. How to hand sew a spider for Halloween decor with Poly-Fil.

Hand Sewn Spider Halloween Decoration with Poly-Fil!


Make a darling spider for the perfect Halloween decoration. This is a hand sewing project and perfect for beginners. 


This is how I learned to hand sew when I was about 7 years old. How to hand sew a spider for Halloween decor with Poly-Fil.


Make a darling spider for the perfect Halloween decoration. This is a hand sewing project and perfect for beginners. This is how I learned to hand sew when I was about 7 years old. How to hand sew a spider for Halloween decor with Poly-Fil.

When I was young, like 6 or 7, I discovered my love of hand sewing. 


I cut large circles of scrap fabric and sewed and stuffed them. 


I was a whiz with the hot glue gun, even at a young age, and my mom was super supportive of my craft habit. 


She set aside a big box of "scrap fabric" that I could use without permission...as well as a big box of Poly-Fil.


When I was young, like 6 or 7, I discovered my love of hand sewing. I cut large circles of scrap fabric and sewed and stuffed them. I was a whiz with the hot glue gun, even at a young age, and my mom was super supportive of my craft habit. She set aside a big box of "scrap fabric" that I could use without permission...as well as a big box of Poly-Fil.

I was thrilled when I made this cute little spider. This one is simple with short legs and only one body part...but it's perfect for beginners.


I was thrilled when I made this cute little spider. This one is simple with short legs and only one body part...but it's perfect for beginners.

Let's make another Spider with a little more time and experience under my belt. 


This cute spider was part of Poly-Fil and Fairfield World's 80th anniversary in 2020! 


If you've stuffed something, chances are pretty good that it was Poly-Fil!


Let's make another Spider with a little more time and experience under my belt. This cute spider is part of Poly-Fil and Fairfield World's 80th anniversary! If you've stuffed something, chances are pretty good that it was Poly-Fil!  #fairfield80 #polyfil #poly-fil #FFWcelebration

Supplies Needed for Stuffed Spider:

  • Black Fabric (this is an old shirt that was on its way out)
  • Poly-Fil
  • Black thread
  • Needle
  • 4 Black Pipecleaners
  • Scissors 
  • Chalk
  • Bowls/Dish or Circle Template
  • Hot Glue/Gun

Supplies Needed for Stuffed Spider: Black Fabric (this is an old shirt that was on its way out) Poly-Fil Black thread Needle 4 Black Pipecleaners Scissors  Chalk Bowls/Dish or Circle Template Hot Glue/Gun

Check out this quick video of the process:


Step 1: Cut Fabric for Spider


Begin by cutting 2 circles. Trace them on the fabric with chalk. I used a child's lunch plate and bowl. 8" circle for the body and 5 inch circle for the head.


Step 1: Cut Fabric for Spider Begin by cutting 2 circles. Trace them on the fabric with chalk. I used a child's lunch plate and bowl. 8" circle for the body and 5 inch circle for the head.

Step 2: Hand Sewing the Spider


Now tie off the thread through the needle, so it's doubled up. Then stitch around the circle, about 1/4" away from the edge.


Step 2: Hand Sewing the Spider Now tie off the thread through the needle, so it's doubled up. Then stitch around the circle, about 1/4" away from the edge.

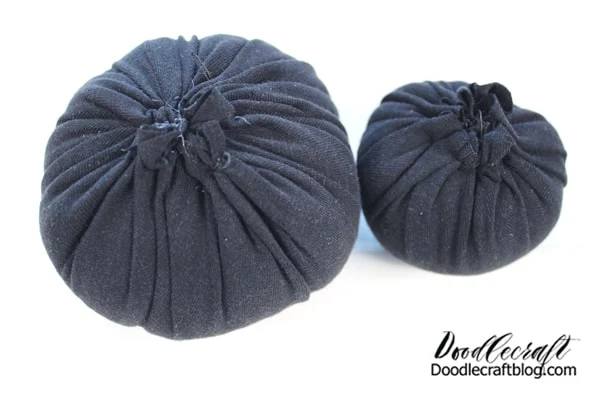
Pull it tight enough to make a pouch.


Pull it tight enough to make a pouch.

Step 3: Stuff the Spider


Then stuff a big amount of Poly-Fil into the pouch. 


I always find that I need more than I think...but way less than the bag! Haha!


Step 3: Stuff the Spider Then stuff a big amount of Poly-Fil into the pouch. I always find that I need more than I think...but way less than the bag! Haha!

Pull the threads firmly to make the fabric into a ball and tie off the thread.


Pull the threads firmly to make the fabric into a ball and tie off the thread.

Step 4: Glue Spider Together


Now cut a small circle of scrap black fabric for covering the opening.


Step 4: Glue Spider Together Now cut a small circle of scrap black fabric for covering the opening.

Glue the 4 pipe cleaners on the base of the spider body and then hot glue and cover the base with another piece of fabric.


Glue the 4 pipecleaners on the base of the spider body and then hot glue and cover the base with another piece of fabric.

Let the hot glue cool down.


Let the hot glue cool down.

Finally glue the head to the body and bend the pipecleaner legs.


Finally glue the head to the body and bend the pipecleaner legs.

That's it! Now you have a darling little stuffed spider for Halloween decorations. 


Make a bunch for an infestation! Cover the mantle, porch or entryway!


That's it! Now you have a darling little stuffed spider for Halloween decorations. Make a bunch for an infestation! Cover the mantle, porch or entryway!

Like, Pin and Share!


Make a darling spider for the perfect Halloween decoration. This is a hand sewing project and perfect for beginners. This is how I learned to hand sew when I was about 7 years old. How to hand sew a spider for Halloween decor with Poly-Fil.


facebook Follow Me on Pinterest Youtube Instagram twitter
postscript

Comments