How to Use We R Memory Keepers Foil Quill with Cricut Maker
Have you used the We R Memory Keepers Foil Quill before? This just fits right in the tool holder for the pen and adds glam to every project.
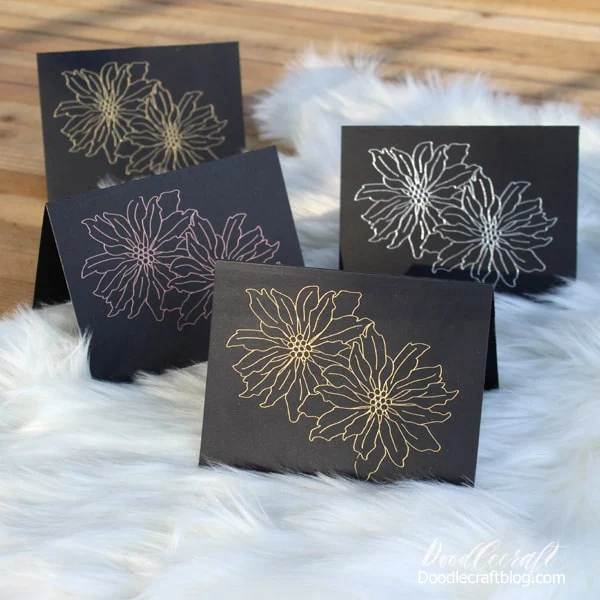
These stunning foiled poinsettia Christmas cards are perfection. Anything the Cricut can draw, it can foil. The results are fabulous!
I love using foil on every project! It just adds the perfect finishing touch!
Here's a full video tutorial that shows how simple this process is:
The We R Memory Keepers Foil Quill comes with 3 quills, 2 the small size and 1 larger one. They plug into a USB port, and there's one right on the side of the Cricut Maker. It plugs in and heats up.
There's a heat shield to protect the machine while it warms. There's also 4 adapters that come with the quill to insert into any cutting machine. Adapter C is what you need for the Cricut.
Supplies Needed:
We R Memory Keepers Foil QuillWe R Memory Keepers Foil (3 rolls are included with the quill)
Cricut Maker (or other electronic cutting machine)
Black Cardstock
Cricut Design Space (draw file)
Step 1: Set Up
Begin by twisting the C adapter onto the quill and plugging it into the USB port on the side of the Maker. Pop the adapter out of the pen tool slot on the left side of the maker. Then push the quill in the slot.
Place the metal protector under the quill as it warms up.
Step 2: Paper Prep
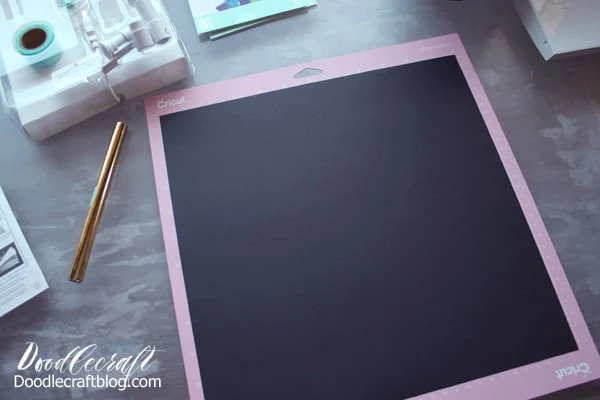
Place the cardstock on the Cricut Mat.
Then tape the foil on the top of the paper with the washi tape that is included with the quill. The shiny metallic side of the foil should be facing up.
Step 3: Foiling!
Then insert the mat into the Cricut machine. Press the start button and watch the quill begin foiling.
The We R Memory Keepers Foil Quill is awesome and draws just like a pen. I don't know about you, but I get super nervous every time I do a new project...but this one basically does itself. Don't panic, just try it!
When it finishes up, it looks so messy! Eek, I thought it had messed up. The lines look dashy and messy...but guess what!?
The final reveal is so pleasing! The gold metallic foiled lines are super smooth and flawless. It's incredible!
Repeat this process for as many cards as your heart desires. I did it in gold, rose gold and silver. I love it and am kind of tempted to send out Christmas cards this year!
Which color is your favorite? I love the gold, it's classic and fabulous. I love the rose gold, it's warm and coppery! And of course the silver, it's perfect with the silver bells vibe.
There's heat foil in every color, so the sky is the limit. This is definitely a tool you'll use every season for every event!
Cricut has lots of drawing fonts, so you can add a foil greeting to the inside of the card too.
Make fancy foiled name place settings, gift tags, and greeting cards. Or get a little more extra by foiling leather, fabric or any medium that fits in a Cricut Maker!
That's it!
Happy foiling everything!
Like, Pin and Share!


-min.jpg)


Comments