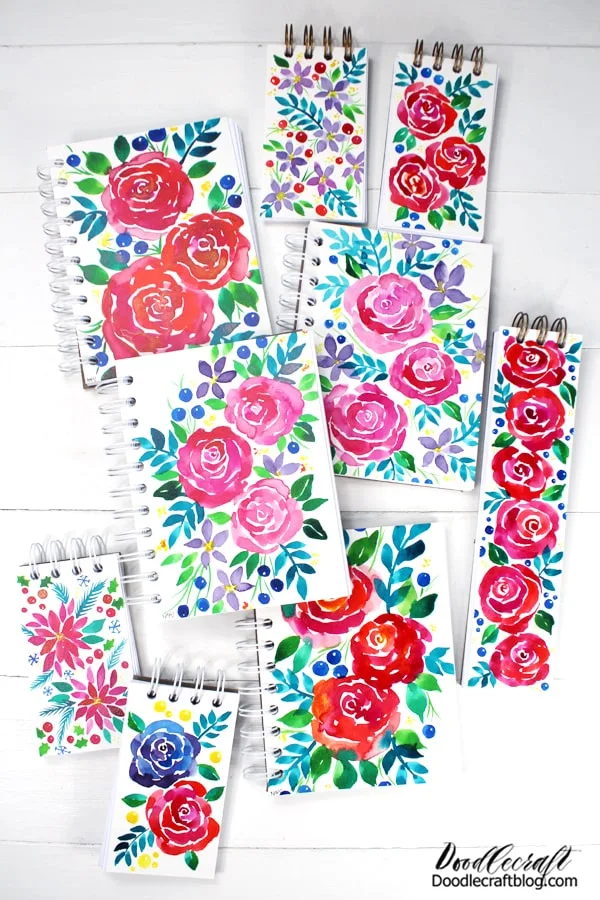
Watercolor Floral Notebooks with The Cinch!
I love making notebooks, journals, diaries, or sketchbooks and The Cinch Binding Tool is the perfect way!
I'll show you how to make your own notebooks for a great handmade gift, keeping track of wonderful doodles, journaling or just because! Make a wire bound notebook in just a few minutes.
Three years ago I found The Cinch at my local thrift store for 15 bucks! I wasn't sure if it worked...that's the risk you take when you buy second hand.
I debated a bit...but then knew I could return the device for store credit if it didn't work out. I bought it and have never looked back!
Here's a video of the Cinch Binding Machine in action from a previous post:
The best part is that notebooks can be made however you want. Pick the size, pick the paper filler, mix it up! Get different size binding wires and make them as thick or thin as you like.
I started with the 4 main books in the center, but after trimming down papers, I had a lot left over. So I made a variety of other sizes and I love them.
Make a notebook and leave the cover blank for the recipient to decorate--or design the cover like I did.
These small notebooks are the perfect size for quick notes, sticking in a purse--great teacher gift idea.
Okay, pro tip:
If you have the Cinch binding machine, the wires can get really pricy. I ordered bulk wires with a 2:1 pitch that are 3/4" in gold and white. (I get mine from MyBinding.com)
Honestly, now that I have the machine, I can't imagine not having it! It's a good price right now, just in time for the holidays.
Supplies Needed for Cinch Binding Notebooks:
Binding Wires with 2:1 Pitch between 3/4 and 1 1/2 inch diameter
Strathmore Heavyweight Mixed Media Paper (this stuff is super thick, perfect for notebook covers)
(you can fill it with colored paper, watercolor paper, sketch paper, filler paper, etc)
For the Watercolor:
Dr. PH Martens India Ink (this gives that bright vivid color)
Step 1: Watercolor
Begin by cutting the thick Strathmore Mixed Media Paper down to the size you want for a notebook cover. Then paint it with the inks in any design you like! Then let the ink dry completely.
Covers can also be left blank for the recipient to design their own!
Step 2: Paper Cut
Now cut the filler paper, the chipboard and the cover paper the size of the notebook. These darling books are 4 by 6 inches.
Each book will need one chipboard piece for the back, one mixed media for the top. The filler paper can be a little more than 1/2 inch thick total...so depending on the thickness of paper it's filled with, the paper quantity will vary.
Step 3: Punching Holes
Now read the chart on the cinch. Because my paper width is 6 inches, I need to pull the number 12 knob out so it doesn't half punch a hole. Then line up the paper on the left side and pull the lever.
The cinch can do up to 20 pieces of filler paper at a time. I usually do only about 6-8 pages at a time.
Repeat the punching process for the chipboard and all the filler paper.
Make sure to line up the paper on one edge and press that edge into the machine.
Step 4: Punching
Now it's time to bind the notebook. Begin by counting the holes on the paper you punched. Then clip the wire to have that many loops. Then hang the wire on the side of the machine.
Slide the chipboard backing on the wires first.
Then place the cover of the notebook face down on the chipboard on the wires.
Double check that when you open the cover that it is the right direction. I've messed a few of these up!
Then stack all the filler paper on the wires.
Step 5: Binding
Carefully lift the wires off the edge and place them right up in the backside of the Cinch. Make sure it is set for the diameter of the wires you are using. Then press the lever to cinch the wires down.
Then remove the notebook and inspect the wires! I love how easily it clamps them down!
Repeat this process for as many notebooks as you can imagine!
I usually start my painting with a slightly larger paper than the finished product, that way I can trim down the edges and make the painting just blend into the notebook.
After cutting down my filler paper into 4x6 inch pieces, I had lots of scrap pieces remaining that I did not want to waste. So I cut some chipboard and cover paper to fit and used my scrap wires to bind smaller notebooks.
Which notebook is your favorite? I'm going to gift a few of these for Christmas, even though I love and hoard notebooks! This makes The Cinch Binding Tool so useful and wonderful...and frankly, worth its weight in gold.
Just add a fun pen and a heartfelt note, boom! The perfect gift! My daughter and I started a traveling journal. She draws on one page, then I draw on the next...we pass it back and forth and look forward to seeing each others art or musings.


-min.jpg)


Comments