How to Make Vinyl Magnets with Cricut Maker!
Learn how to make your own vinyl magnets using the Cricut Maker or Cricut Explore Air 2. This fun DIY is quick and makes a fun gift.
Plus, these can stick on cars, metal water bottles, car bumper stickers, lockers and much more! Design any image you want, even something you drew yourself and turn it into the perfect magnet.
Stick around to the end of the post for all my tips on starting your own Cricut Business, Everything you need to know before buying a Cricut and a bunch of Homemade Cricut Gift ideas!
Are you familiar with Fallout 4? It's a first person shooter, post apocalyptic game with quests, companions and lots of radiated monsters. The currency of the game is bottle caps, hence Nuka Girl as the cola mascot. There's magazines you can collect, that's the Grognak magnet below.
It's my husbands favorite video game. He plays it with various mods every Winter to help him cope with the cold. I decided to make some Fallout 4 themed magnets for him for Christmas. I just knew it would be fun for him.
Supplies Needed for Homemade Magnets:
- Cricut Machine
- Cricut Printable Vinyl
- Printer (I'm using an HP Deskjet)
- Magnet Sheet
- Scissors
- Clear Spray Coat
- Images to turn into magnets
Step 1: Design Sticker Image
Begin by opening up Cricut Design Space. Then click the upload button.
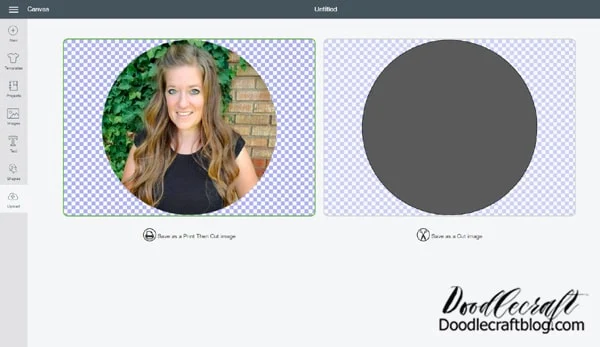
Select your desired picture and remove the background if needed. Then select the COMPLEX image type.
Next save the image as a Print Then Cut image.
And then upload the image into your canvas. Arrange and attach images as desired and then send click make!
Step 2: Print Stickers
Send the page to the printer. It will print a rectangle registration mark around the entire page. The Cricut is amazing and will scan the marks so it cuts it out perfectly.
Step 3: Cut Stickers
After printing, place the page on the Cricut Light Grip Mat and then place it in the Cricut.
The Cricut will scan the black border registration mark around the images and then line up the blade perfectly to cut all the stickers out.
The stickers are ready to use! They could be used just like this as stickers for notebooks, water bottles, or other nostalgic purposes.
Step 6: Magnet Sheet
Now peel off the covering off the magnetic sheet. Peel off a sticker and adhere it on the sticky surface of the magnet. Repeat for each sticker.
Step 7: Cut Magnet
Now use the scissors to cut around each sticker carefully. Take your time and use small scissors. It can be a little tricky because the magnet sticks to the scissors a bit. It's not too much work though. The square images I just cut on my paper cutter, so that was a cinch.
It may be possible to adhere the sticker page to a magnet page and then have the Cricut cut them out together, but I did not want to waste all the extra magnet. It would likely take the deep cut blade to cut through the magnet sheet entirely.
Now the magnets are ready to hang on the fridge, car or other place to enjoy! Magnets make a great alternative to bumper stickers that are hard to remove.
What kind of magnets are you excited to make?
Draw your own images, make party favors themed with the party, or make some for better organization as labels.






-min.jpg)

-min.jpg)





-min.jpg)


Comments