How to Make Harry Potter Shirts with Cricut!


This post may contain affiliate links, sponsored content and products received at no cost.
6:00 AM
Make the perfect Harry Potter shirts for any occasion with the Cricut! I love Harry Potter! I love using my Cricut to create custom shirts, mugs and other items. Customizing things is the best! It's not always easy to find the exact shirt you have in mind, but if you can make it yourself, it's a win!

How to Make Harry Potter Shirts with Cricut!

Make the perfect Harry Potter shirts for any occasion with the Cricut! I love Harry Potter! I love using my Cricut to create custom shirts, mugs and other items. Customizing things is the best! It's not always easy to find the exact shirt you have in mind, but if you can make it yourself, it's a win!

The Cricut is my favorite crafting tool. I love the versatility that it offers and use it all the time. It is my go-to item for customizing gifts and of course, Harry Potter shirts!

The Cricut is my favorite crafting tool. I love the versatility that it offers and use it all the time. It is my go-to item for customizing gifts and of course, shirts!

When I was in college I had to take public transportation (aka the UTA bus) to the University of Utah. I usually made the express bus in the morning with a lot of business commuters. One of my friend's husbands took the bus too. He was reading a gigantic book. I commented on it, remarking on what a big book it was. He just shrugged and said "it's just Harry Potter". 

I sat there stunned, because I had no idea, not even a clue what that meant. Lol! Fast forward a couple years, and of course I knew what it was and actually had some time to read it myself. About 9 years ago I had my kids listen to the audio books with me and it was so much fun to get through the books so quickly with Jim Dale.

When I was in college I had to take public transportation (aka the UTA bus) to the University of Utah. I usually made the express bus in the morning with a lot of business commuters. One of my friend's husbands took the bus too. He was reading a gigantic book. I commented on it, remarking on what a big book it was. He just shrugged and said "it's just Harry Potter".   I sat there stunned, because I had no idea, not even a clue what that meant. Lol! Fast forward a couple years, and of course I knew what it was and actually had some time to read it myself. About 9 years ago I had my kids listen to the audio books with me and it was so much fun to get through the books so quickly with Jim Dale.

Supplies Needed for Harry Potter Shirts:

Black T-shirt
Harry Potter PNG files below


I made these 2 little baby shirts for a friend. Her son just turned one and these were the perfect shirts for his first birthday! Let's get started!

Supplies Needed for Harry Potter Shirts: Cricut Maker (or cutting machine) Cricut Foil Iron-on (gold) Black T-shirt Cricut EasyPress 2 and Mat Cricut Design Space Harry Potter PNG files below

Step 1: Cut Iron-on

Begin by importing the design into Cricut Design Space. Save it as a cut file, then import onto canvas. Make the image the size you want, then click the cut button. Mirror the image and select the material (iron-on). 

Place the iron-on on the mat with the shiny side down and then insert it into the machine. Click the flashing "GO" button and cut it out.

Step 1: Cut Iron-on Begin by importing the design into Cricut Design Space. Save it as a cut file, then import onto canvas. Make the image the size you want, then click the cut button. Mirror the image and select the material (iron-on).   Place the iron-on on the mat with the shiny side down and then insert it into the machine. Click the flashing "GO" button and cut it out.

Step 2: Weeding Vinyl

Remove the cut iron-on from the mat and cut around the image. Then remove the extra iron-on vinyl from the cut image.

Step 2: Weeding Vinyl Remove the cut iron-on from the mat and cut around the image. Then remove the extra iron-on vinyl from the cut image.

Step 3: EasyPress

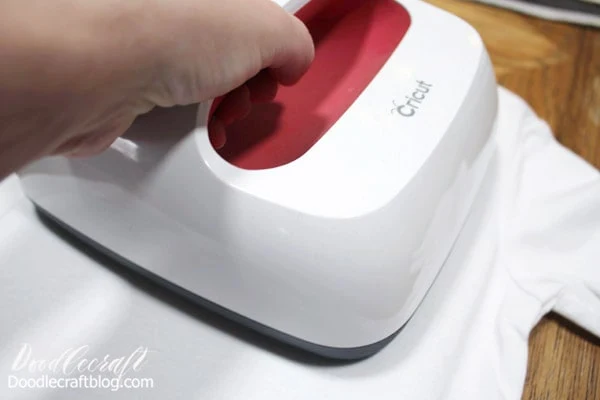
Now place the shirt on the EasyPress mat and warm the shirt up with the EasyPress.

Step 3: EasyPress Now place the shirt on the EasyPress mat and warm the shirt up with the EasyPress.

Step 4: Place Iron-on

Place the iron-on on the shirt with the shiny carrier sheet up and the text readable. Then press firmly with the EasyPress for the recommended amount of time. Check this chart here.

Step 4: Place Iron-on Place the iron-on on the shirt with the shiny carrier sheet up and the text readable. Then press firmly with the EasyPress for the recommended amount of time. Check this chart here.

Step 5: Layer Two

After the iron-on has cooled down completely, peel off the carrier sheet by rolling it back over itself. Save the carrier sheet.

Step 5: Layer Two After the iron-on has cooled down completely, peel off the carrier sheet by rolling it back over itself. Save the carrier sheet.

Then place the second layer of iron-on on the shirt, lining it up properly. Then cover the original iron-on with the saved carrier sheet. This will protect the vinyl from direct heat from the press.

Then place the second layer of iron-on on the shirt, lining it up properly. Then cover the original iron-on with the saved carrier sheet. This will protect the vinyl from direct heat from the press.

Step 6: EasyPress

Now press with the EasyPress a second time for the recommended amount of time. Add firm pressure to the press, but do not stand on it...it doesn't need that much pressure.

Step 6: EasyPress Now press with the EasyPress a second time for the recommended amount of time. Add firm pressure to the press, but do not stand on it...it doesn't need that much pressure.

Let the iron-on cool down completely and then remove the carrier sheets. The shirt is now ready to wear! I love how easy it is to customize a tee shirt--they make the perfect gifts!

Let the iron-on cool down completely and then remove the carrier sheets. The shirt is now ready to wear! I love how easy it is to customize a tee shirt--they make the perfect gifts!

***CRICUT LAYERING QUICK TIP:***

The PNG file above for the Chosen One is all one layer. To change the color, import two of the same images into your canvas in Cricut Design Space. Then select one of the layers and click the "contour" button at the bottom sidebar. 

Select just the shapes you want for the first layer, then make it all black. Repeat for the second image, leaving just the lightning bolt and the ONE, and make them gold. Overlay them so they match up perfectly and then "attach" them. 

Be sure to select both images when sizing them. Sounds complicated, but it's not!

***CRICUT LAYERING QUICK TIP:*** The PNG file above for the Chosen One is all one layer. To change the color, import two of the same images into your canvas in Cricut Design Space. Then select one of the layers and click the "contour" button at the bottom sidebar.   Select just the shapes you want for the first layer, then make it all black. Repeat for the second image, leaving just the lightning bolt and the ONE, and make them gold. Overlay them so they match up perfectly and then "attach" them.   Be sure to select both images when sizing them. Sounds complicated, but it's not!

For the black shirt, I just used white iron-on and it was all one color. Nothing could be simpler than a shirt like this. Just take your time weeding it so you don't miss any of the little insides of letters.

For the black shirt, I just used white iron-on and it was all one color. Nothing could be simpler than a shirt like this. Just take your time weeding it so you don't miss any of the little insides of letters.

That's it!

Like, Pin and Share!!!

How to make Harry Potter shirts using the Cricut and iron-on vinyl. Great for customizing shirts, mugs, bags, totes and all kinds of other unique items. Great for gifts!


Trophy Wife...but like a participation trophy


facebook Follow Me on Pinterest Youtube Instagram twitter 
postscript

Comments