How to Use the Cricut Mug Press
Making mugs is my favorite craft and Cricut has made it so easy! The Cricut Mug Press is a heat press that is designed specifically for sublimation on mugs, tumblers and other cylinders. Make a custom mug from start to finish in a half hour or less--the perfect craft for a last minute gift.
The Cricut Mug Press is a game changer. I've been making sublimation mugs in the oven since last year and love how they turn out...but I love not having to use my kitchen for sublimation. The Mug Press is the perfect size for a craft shelf. It heats up fast and takes about 5 minutes to infuse a mug.
I received the Cricut Mug Press in exchange for my tutorial. I love Cricut and have been working with them for 6 years. It's been so much fun to create with Cricut--let's get started!
The Cricut Mug Press comes packaged beautifully with just the Mug Press. I recommend buying a bundle to get started.
Purchase here on my Amazon link
Purchase Cricut Mug Press from Cricut
Supplies Needed:
Step 1: Design the Mug
Design your image on Cricut Design Space. The mug wrap should measure 4 X 9 inches. I used the square too, then click the unlock icon and change the parameters to a rectangle.
The use the shape tool to make a 2" circle. Overlap the rectangle and circle, then select both layers and click the "slice" button.
Delete the extra circle layers so you are left with a rectangle with a cut out circle. Now pick your favorite font for the perfect monogram to fit inside the 2" circle.
Then send the design to the Maker to cut. Reverse the image by clicking the "mirror" button.
Step 2: Cut the Infusible Ink
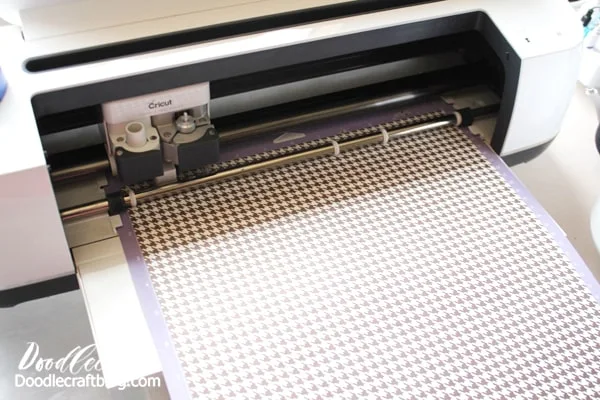
Place the Infusible Ink on the strong grip mat with the color side up.
Then click the start button to cut the design.
I did a houndstooth pattern background, then cut the monogram out of just black Infusible Ink.
Step 3: Mug Preparation
Clean off the mug with the included lint free cloth. Then place the monogram cut out on the blank circle of the background Infusible Ink.
Then place the Infusible Ink on the mug with the colored ink touching the mug. Hold the Infusible Ink transfer in place with heat resistant tape.
Step 4: Warm up Cricut Mug Press
Plug in the Cricut Mug Press. If it is the first time you are using it, there is a connection process that takes a few minutes, but is super easy.
Just follow the "Get Started" book and plug in the Cricut Mug Press to your computer.
Step 5: Cricut Mug Press time
Now place the mug inside the Cricut Mug Press and close the latch so the mug is cradled tightly.
The Cricut Mug Press will heat the mug for about 5 minutes, and will light up the row of lights until all are lit. Then open the latch and remove the mug.
Careful, it's hot!
Let the mug cool down completely, then remove the heat resistant tape and Infusible Ink Transfer and boom, it's done!
The Infusible Ink Transfers smoothly onto the surface with a bright and vivid colors. The mug is dishwasher and microwave safe, so it makes the perfect gift!
Seamless transfer, vivid and vibrant colors and so many endless options! I am in love with making mugs and it's compounded by the efficiency of the Cricut Mug Press.
**Cricut Business?**
Do you have a Cricut Machine? Are you thinking out making some money with it this upcoming holiday season? Check out this post on turning your Cricut into a Business!
That's it!
Like, Pin and Share!


-min.jpg)


Comments