How to Use the HTVRONT Auto Heat Press!
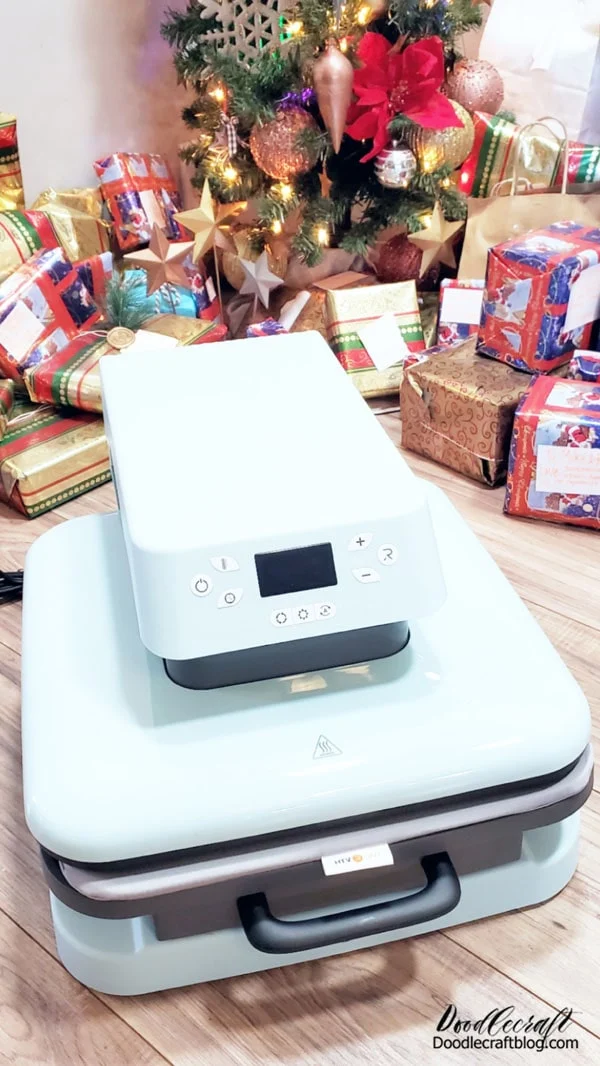
Learn how easy it is to use the HTVRONT Auto Heat Press. It's a crafter dream come true. It is a total game-changer for heat transfer and sublimation projects. No more stress about creating even pressure or all the little details...this machine does all the work for you.
I'm so excited to showcase my new HTVRONT Auto Heat Press machine! I received this machine just days before Christmas in exchange for this post and my honest review.
I'm also an HTVRONT affiliate, so sales will give me a small commission. Thank you!😘
Here's 3 things I love about the HTVRONT Auto Heat Press:
- Large Heat Press size, it measures 15x15 inches!
- Even Pressure--No standing, pushing, slipping or uneven heating!
- So easy to use! Heats up quickly, quietly and super simple button menu!
And, it's Blue--I am so glad they sent me the blue one, I love it!
It's a fantastic price for an auto heat press--Under $300! (compared to other brands at $800)
Honestly, now that I have it, I can't imagine my craft game without it! I really love it!
The HTVRONT Auto Heat Press takes up desk space, but has hand holds on the sides to make it easy to move around. It's solid and weighs about 33 pounds. I keep mine on my desk, so there's not much moving it around.
I have noticed a few "popping" or adjusting sounds when my machine is heating up, but I'm not concerned. I think it's just the plastic adjusting to the heat, since my older heat presses make similar sounds.
**HTVRONT also sells vinyl, HTV and other types of heat presses. They have great prices--you'll be seeing much more about this all year!
Step 1: Heat Up HTVRONT Auto Heat Press
Plug in the HTVRONT Auto Heat Press
To set the temperature, click the thermometer button and then the plus or minus buttons. Then click the thermometer button after reaching the desired number.
Set the temperature to 400 degrees.
Set the time button in the same way, to 30 seconds.
Step 2: Iron Shirt
Pull the handle on the HTVRONT Auto Heat Press and slide out the tray with the heat pad on it.
Set the shirt on the pad, making sure it is laying flat.
Immediately, the heat press will press the heat element down on the pad for the amount of time selected.
Once finished, the heat element will raise up, then slide the tray out again.
This will iron out any wrinkles and get the shirt warm and ready for the sublimation.
Then push the tray back under the heat press and push the glowing green "R" button.
Step 3: Sublimation Print!
Now print out a photograph, text or image that has been mirrored on sublimation paper using a sublimation printer.
I love my sublimation printer and actually had my previous one break on me...so I immediately bought a new one. Check out my Setting up a Sublimation Printer Post.
Step 4: Heat Press Sublimation!
Use heat resistant tape to tape the printed sublimation photograph ink side down on the shirt.
Set the heat press to 400 degrees and 30 seconds.
Cover the shirt and sublimation print with the Teflon sheet and slide the tray inside the machine.
Slide it out when it's done and let the shirt cool down.
Then peel off the sublimation paper and heat tape.
Unplug the machine when not in use.
That's it!
The HTVRONT Auto Heat Press is super easy to use and the best addition to my craft tools during the entire year of 2022. I'm excited to see how much I use it during this year!

-min.jpg)
-min.jpg)
-min.jpg)
-min.jpg)
-min.jpg)
-min.jpg)
-min.jpg)
-min.jpg)


-min.jpg)


Comments