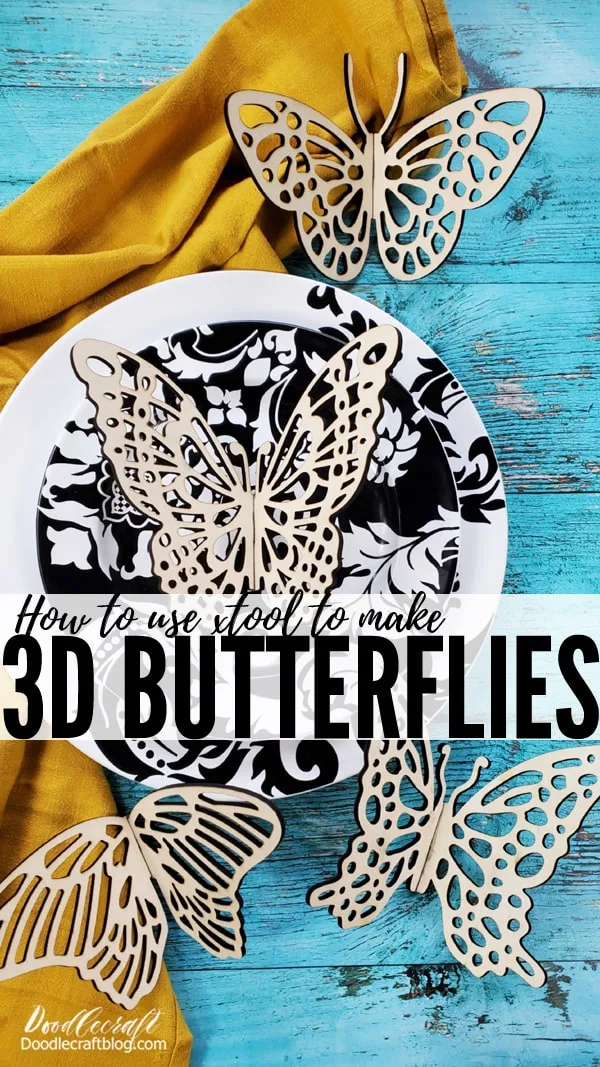
3D Butterflies with xTool M1 Laser Cutter
Here's the perfect craft to absolutely WOW your guests and it only takes a few minutes!
See how easy and fast it is to make these darling dimensional butterflies with basswood and the xTool.
Gorgeous on the festive holiday table, as stunning Christmas tree decorations/ornaments or just because.
I am totally in love with how these little 3D butterflies turned out.
They are 2 pieces of 3mm basswood, cut intricately, that slide into each other to make a little stand.
Supplies Needed for 3D Butterflies made with xTool M1:
- xTool M1 Everything Bundle (includes Air Assist)
- 3mm Basswood
- xTool Creative Space Software
- 3D Butterfly File (FREE)
Step 1: Butterflies
This amazing Butterfly file is free from Design Bundles and comes with 10 different butterfly designs.
Get the file downloaded and open up xTool Creative Space.
Then select the DXF file for the butterfly you want and open it in XCS.
I picked 4 of my favorites and was able to fit them all on one 12x12 piece of 3mm basswood.
Step 2: Laser Cutting
In xTool Creative Space, select the entire butterfly and it's parts as you load it in and then click the "subtract at overlap" under the combine button to make them all one file.
Then select the "cut" option so the lines are all cut.
Select the triangle prisms, and the 3mm basswood and then it's ready to send to print.
Mine was a close, tight fit, so I did the framing and tested out the cut area...which was absolutely so perfectly close.
Then click Go!
Step 3: Basking in Joy!
Laser cutting is so fulfilling!
I love seeing these amazing and intricate cuts every time!
These cut perfectly, just pop out the little pieces and they are ready to fit together.
The file is made for both 3mm and 1/8th inch wood thicknesses, so all the work has already been done with these shapes.
They slide together beautifully and stand on their own too!
The basswood could be colored with alcohol ink markers (like this cake topper I did) or painted with watercolor gels (like this sign I did) or painted with acrylic paints (like these butterfly wings I made with the same file).
Not gonna lie though, I love plain basswood.
I love the look of it, I love the burnt edges.
I absolutely love the smell of it.
So I leave most of my projects "unfinished" for that reason.
These dimensional butterflies look stunning on the table as a place setting.
They also look amazing in a cluster and would look fabulous mounted on a wall!
These are so many options.
These finished butterflies are about 4-5 inches in length or width.
They are a good size and won't break if handled carefully.
If you have small children, make these butterflies out of acrylic or cardboard and they'll be much more durable.
I love how they look on the center of the place settings.
They could easily be engraved with a name or power word.
I really should make all ten of the butterfly designs because they are all different and unique.
I picked my 4 most favorite for this craft, since there's only 4 of us in our home right now...and they all fit on one piece of 12x12 basswood with a little piece to spare for another project.
Again these are sized perfectly to fit together.
If you scale them up or down, they won't fit together quite the same...or not at all.
When I made the wearable butterfly wings, I scaled them up enough that 2 layers of cardboard stacked together on each side fit perfectly.
These 3D butterflies can be glued together to stay open and dimensional permanently...or they can be left unattached, so they slide apart at the end of the occasion and can be stored flat.
This also makes a really fun gift (especially and easy one to ship) because it's not bulky but becomes beautifully dimensional.
That's it!
Hope you love learning how to make 3D Butterfly place settings with basswood and xTool M1 laser cutting machine.
It really takes no skill to make something this beautiful, with the help of a free butterfly file and the perfect crafting xTool laser cutter!

-min.jpg)
-min.jpg)
-min.jpg)
-min.jpg)
-min.jpg)
-min.jpg)
-min.jpg)
-min.jpg)
-min.jpg)
-min.jpg)
-min.jpg)
-min.jpg)
-min.jpg)
-min.jpg)
-min.jpg)
-min.jpg)

-min.jpg)
-min.jpg)
-min.jpg)
-min.jpg)
-min.jpg)
-min.jpg)
-min.jpg)
-min.jpg)
-min.jpg)
-min.jpg)
-min.jpg)
.jpg)
-min.jpg)
-min.jpg)
-min.jpg)
-min.jpg)


-min.jpg)


Comments