
-min.jpg "HTVRONT Mini3 Heat Press Review (Small Project)")
HTVRONT Mini3 Heat Press Review (Small Project)
Learn how to make an rose gold metallic iron-on tote using the newest heat press.
The HTVRONT Mini3 Heat Press is the perfect small project heat press for iron-on, HTV, heat transfer projects, DTF Transfers and even gets hot enough for sublimation!
This post is a review on the Mini3 Heat Press and a quick heat transfer vinyl tote project to showcase it's awesome abilities!
-min.jpg)
What Can I Make with Heat Transfer Vinyl?
Making custom elements on totes, bags, shirts, fabric, cork and even wood is so fun using heat transfer vinyl or iron-on material...both the same thing.
I love adding unique iron-on to already awesome totes. (Just takes a cutting machine like Cricut, Silhouette Cameo or other brand)
I'll walk you through this easy tutorial using my new Mini3 heat press and show you all the cool features in the process.
-min.jpg)
I just received the newest HTVRONT heat press machine: affiliate links
Use code: andrinamini3 for 20% off with code + $10 worth of supplies (random) until September 13th.
I have used quite a few heat presses to press everything from heat transfer vinyl, sublimation prints, Infusible Ink and DTF Transfers.
The heat plate is key when doing things like Infusible ink, which does much better with just one press instead of moving the heat press around.
But for small sublimation projects or Infusible Ink, the Mini3 Heat Press would work great.
The Mini3 Heat Press is great for ironing as well as larger projects of iron-on or heat transfer vinyl.
-min.jpg)
HTVRONT MINI3 HEAT PRESS REVIEW:
How Does the HTVRONT Mini3 Heat Press compare to the HTVRONT Mini Heat Press?
I have both and have loved my original...I can see it taking a back seat though, thanks to the Mini3.
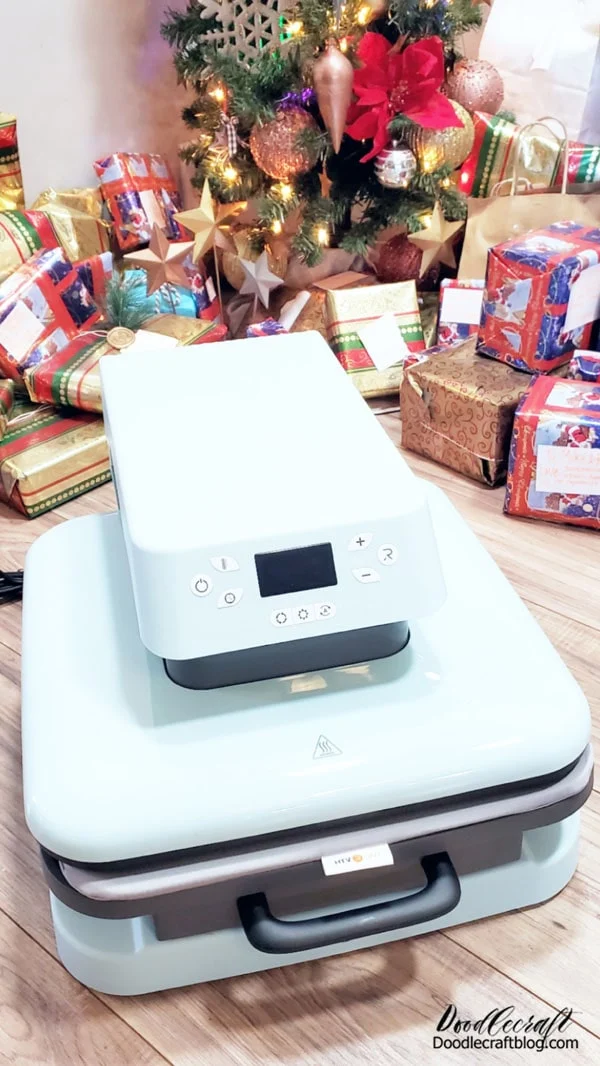
HEAT PRESS MINI SIZE COMPARISON:
Check out the size difference of these two heat presses.
The original heat press mini is adorable and tiny, the heat plate is about 4 1/4 by 2 1/2 inches.
The Mini3 has a heat plate that measures about 6 by 4 inches, so a much larger working size for larger projects.
-min.jpg)
TEMPERATURE SETTINGS:
The original mini heat press has 3 settings for low temperature, medium temperature and high temperature heat setting range...which isn't an exact temperature setting for things that require high temps like sublimation.
The Mini3 has a screen panel and option to change the temperature up to the maximum temperature of 400* to accommodate sublimation heat pressing.
There's a time button to control how long you want to press and the beep to tell you time is up.
To begin the timer countdown while pressing, press the power button and HOLD for 2 seconds, it will engage the countdown.
-min.jpg)
SAFETY FEATURES:
The Mini3 Heat Press will auto shut off after 15 minutes of inactivity, while the Mini heat press auto shuts off after 10 minutes.
The auto-off feature is nice if you forget to turn things off regularly...but can be a hassle if you are still using it. It's still a safety feature I'm happy about.
The Mini3 as well as the original Mini Heat Press are made with high-temperature resistant materials so they don't get too hot to handle or cause hazzards.
The safety base has been designed to insulate, so the element stays hot and the surface you are working on doesn't.
-min.jpg)
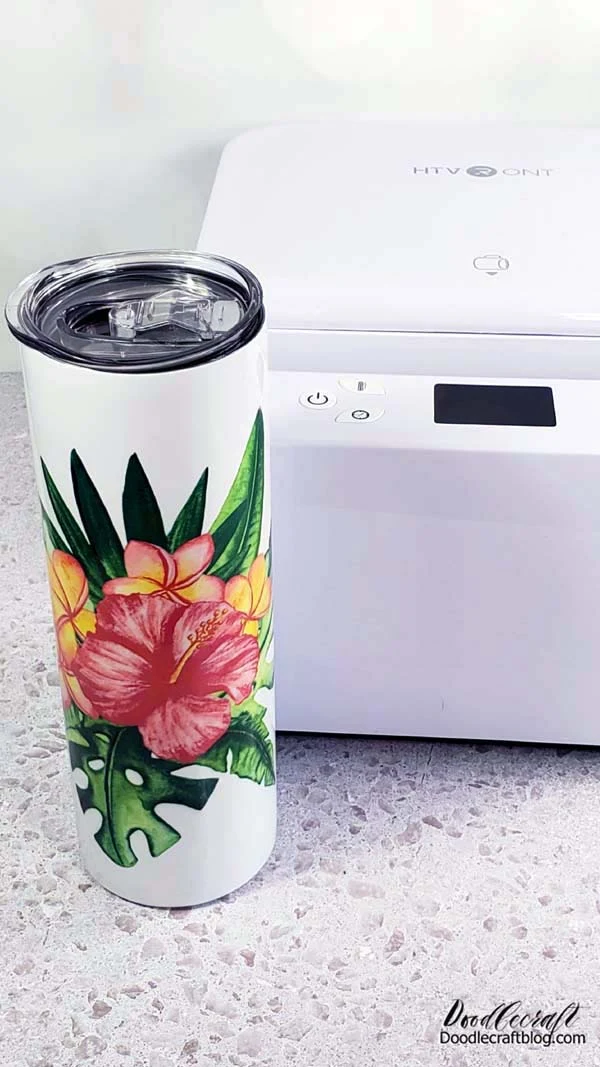
CURVED HEAT PLATE:
The safety base is awesome, but it has also been designed to hold a tumbler, and the heat plate of the Mini3 has been designed with a curve--so you can press things like tumblers, hats, shoes and many other curved surfaces as well!
(I haven't tried this feature yet, but it is an awesome addition).
Find out more on the official website here.

FAST AND EFFICIENT:
While doing my first project with my HTVRONT press, I noticed super fast heating, like just seconds of heat-up time.
I love the size, I like how it feels to use...and it's a good choice for space saving in the craft room...especially if you don't have room for a new HTVRONT auto heat press.
It's a great price and you can get it bundled with other products for even more savings.
-min.jpg)
How to Make a HTV Tote with HTVRONT Mini3 Heat Press:
Supplies Needed for HTV Tote:
- Tote with Metallic Accent
- HTVRONT Mini3 Heat Press
- Rose Gold HTV (or any metallic htv)
- Electronic Cutting Machine
- Heat Press Mat
- Teflon Sheet (optional)
-min.jpg)
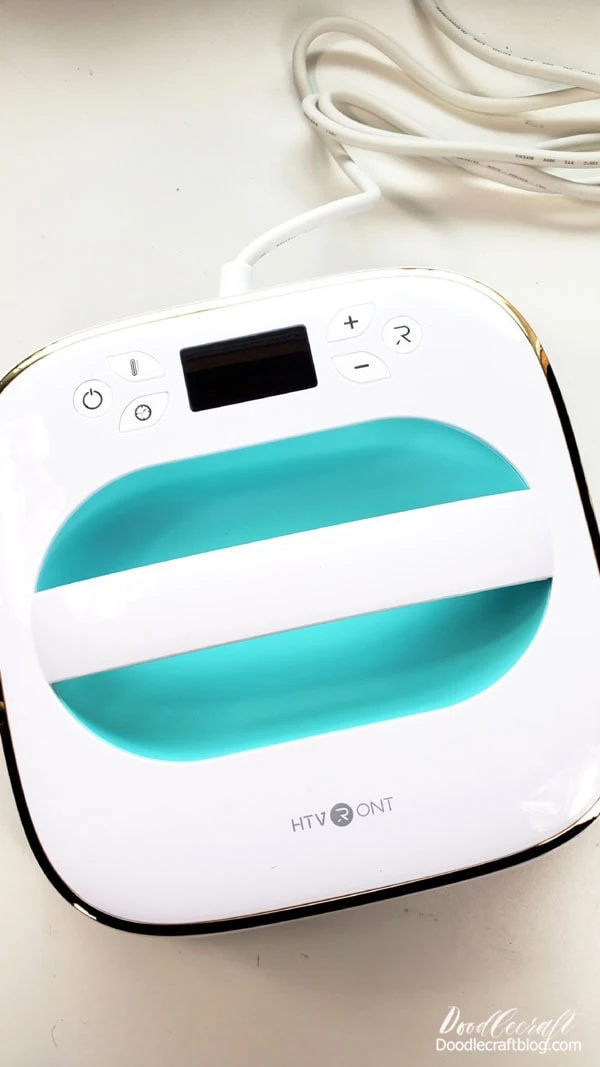
Step 1: Mini3 Control Panel Settings
First step is to plug in the HTVRONT Mini3 and use the control panel to change the settings on the digital screen.
Power the machine on with the Power button, also press and hold the power button for 2 seconds to start the timer countdown.
The second button that looks like a gear is to alternate between the temperature button and time button...plus holding it down will switch you from Celsius to Fahrenheit.
The plus and minus buttons are for scrolling up or down through the temperature and times.
-min.jpg)
Set the time to the correct time for pressing, I did 30 seconds. (check the pressing time and temperature settings on your HTV)
Set the temperature to the correct heat for pressing, I set it to 300*F.
<Check the Quick Reference Chart for temperature and time settings>
-min.jpg)
Step 2: HTV Cutout
Have you electronic cutting machine cut the desired image for your project.
Remember when working with HTV or Iron-on to put the shiny side down on the mat and cut the image in reverse.
Use a hook tool to weed out the excess vinyl and make sure it fits on the planned portion of the tote.
Place the heat mat inside the tote and pull the handles out of the way.
Make sure your tote is not lined with plastic or it will melt to the mat.
Then use the heat press and warm that area up before placing the htv on the tote.
-min.jpg)
Step 2: Begin Countdown Timer on HTVRONT Mini3 Heat Press
Again, as stated a couple times, press and hold the power button for 2-3 seconds to engage the countdown setting.
Once it's counting down, heat press the iron on to start with gentle but firm pressure.
-min.jpg)
No worries about heating the entire surface at once, just gently move the press around on your project, with medium to heavy pressure to make sure it adheres to the thick canvas tote bag.
-min.jpg)
Step 3: Peel off Carrier Sheet
Let the iron on cool down completely and unplug the Mini3 heat press.
Doing a cool peel is the only thing I have difficulty finding the patience for...you can pick up your tote and gently blow it around to help it cool down faster.
I want to just peel it right off but it will often pull, stretch and move if it's still warm. (trust me on this)
So let it cool down and then remove the carrier sheet from the heat transfers for absolutely excellent results!
-min.jpg)
Well, frankly the decision process should be simple on this one!
The faster heating, the higher heating up, the size and the safety use & auto shut down features make this a must-have efficient heat press machine.
The good news--it comes in 3 colors! Laurel Green (like mine), Bubble Blue and Lavender Purple.
-min.jpg)
I love having a small and powerful heat press for most of my projects so I don't have to hoist out the big heat presses for medium or small projects.
I have a variety of presses and use this size the most!
It's been an awesome addition to my craft arsenal and I'm sure you'll be seeing much more of it too!
Hopefully this review answered all your questions about the new HTVRONT Mini3 Heat Press!
I'm hoping to get the new manual heat press to review as well--I'll update this post as soon as I do.
I've been pleased with the product quality of my HTVRONT heat presses and will share them all at the end of post below.
I think the price for the Mini3 Heat Press is great, even better when bundled.
-minPIN.jpg)
That's it!
Hope you found this review of the HTVRONT Mini3 Heat Press helpful and informative as you decide which color of heat press you are going to get!
Plus, this simple tote bag upgrade that was made with the HTVRONT Mini3 and how simple and easy it was to press.
I love adding fun elements to high quality products to make them a little more unique and this tote definitely fits my style!
Like, Pin and Save!
-minPIN.jpg "HTVRONT Mini3 Heat Press Review (Small Project)")
Find out more on each of these HTVRONT heat press machines:
HTVRONT Hat Heat Press
Meet the New HTVRONT Hat Heat Press!
The HTVRont Hat Heat Press is arguably the best compact hat heat press on the market!
The curved heat plate makes making sublimation and HTV hats a breeze!

HTVRONT Auto Tumbler Heat Press
Making sublimation tumblers is so much fun!
There really is something so amazing about designing something or printing something off and then having it sublimated like magic onto a surface blank.
I love making sublimation things for custom gifts; perfect for teachers, birthday's, holiday gifts and more!
-min.jpg)
HTVRONT Charity Event
I was honored to be asked to participate in HTVRont Cares & Tumbler Heat Press Charity event this year!
HTVRont asked me to help give back to my community by creating custom tumblers for a group of people.
-min.jpg)
Learn how easy it is to use the HTVRONT Auto Heat Press.
The htvront autopress is a crafter dream come true--free hands!
It is a total game-changer for heat transfer and sublimation projects because of the large heating plate.
No more stress about creating even pressure or all the little details...the htvront auto press does all the work for you.
Check out the full HTVRONT auto heat press review!
-min.jpg)
HTVRONT Heat Press
Watch how easy and fast it is to customize a drawstring bag with HTV and HTVRont Heat Press!
As soon as Spring hits, I'm already dreaming of Summertime. I love everything to do with the beach, hibiscus flowers and a lot of sunshine.
The HTVRONT Heat Press has a advanced pressure transducer or pressure display to show you if you are applying enough or too much pressure to the project!
-min.jpg)
How to Make Waterproof Stickers with HTVRont!
I love making my very own stickers.
They are so fun to customize mailers, give as gifts, add to handmade cards, slap on water bottles and more!
Learn how easy it is to create custom stickers for yourself, for handmade gifts, or to start a side hustle.
Making waterproof stickers with HTVRont sticker paper is easy and so much fun!
-min.jpg)


-min.jpg)


Comments