
-min.jpg "How to Make Custom Screen Printed T-shirts with xTool")
HOW TO MAKE CUSTOM SCREEN PRINTED T-SHIRTS WITH XTOOL
Learn how to make your own custom t-shirts with xTool screen printing!
Take your own design, image or logo and flawlessly screen print it onto shirts, merch, gear bags, and much more!
This is a great way to make custom merchandise for a business, handmade gifts, family reunion shirts!
Let's get started!
-min.jpg "How to Make Custom Screen Printed T-shirts with xTool")
I got the xTool Screen Printing kit clear back in March and I've been putting this project off...much longer than I should.
But since I got it out last weekend, I've done well over 50 prints!
Screen printing is an old love of mine and I am excited to be rekindling this now!
Thanks to xTool for making it so easy and just a few simple steps in partnership with an xTool Laser Cutting Machine.
-min.jpg "How to Make Custom Screen Printed T-shirts with xTool")
Backstory:
I grew up loving art and all art classes. In 9th grade, around age 14, I was invited to take the honors art class that my art teacher offered for freshmen. I loved it.
This class gave me the opportunity to make silver jewelry, throw ceramic pots, and experience more hands on art or craft, my favorite.
When I got to high school, I got into the advanced art classes there and loved them.
I was in the commercial art class in my senior year and got the chance to learn all about silk screening.
This was olden days, complete traditional method for the screen printing process!
I had to put the photo emulsion on the screen, worry about exposure times and UV light burn the art film transparencies in a dark room onto the screen and then silk screen t shirts, with the screen printing ink, place them on the conveyor dryer and make some more.
I found this old blue ringer at the thrift store (we had to bring in our own t-shirt for the class, but the screen printing frame, plastisol ink and equipment was the schools) and decided to make a little flower doodle to silk screen on the front.
The heavens parted, lights shown down, I knew silk screening was a favorite.
That's me with the short blonde hair, circa 1999, wearing the final result--my custom design.

My friend Marie was in my commercial art class too, and she designed a screen printed shirt for our senior trip to California. You can see me wearing it below. (on tip toes)
These were both simple designs, printed in just one color. It's a great way to start.
-min.jpg "How to Make Custom Screen Printed T-shirts with xTool")
Years, even decades have passed...and now I am finally reinventing my commercial art skills in a much easier way using the xTool Screen Printing Kit with my S1 laser.
I love that xTool has found a way to make silk screening easy and space efficient in a small home. You can add screen-printed shirts to your home business!
No need for an entire art room!
-min.jpg "How to Make Custom Screen Printed T-shirts with xTool")
SUPPLIES NEEDED FOR CUSTOM SCREEN PRINTED SHIRTS:
- xTool S1 Laser Cutting Machine
- xTool Screen Printing Kit (Contains 4 frames, 12 screens, 11 inks and a few other supplies)
- Shirts (Best prices on blank shirts at ShirtSpace)
Here's a xTool S1 20W Laser and the xTool Basic Screen Printing bundle (awesome price)
-min.jpg "How to Make Custom Screen Printed T-shirts with xTool")
The xTool Multi-color Screen Printing kit comes with everything you need to do full color screen prints.
The squeegee, the inks, everything is included. The screens are 100 mesh, covered with emulsion already that are ready to laser engrave.
You will need a laser cutter, xTool S1 is compatible with the screen printing kit.
There is a basic kit (slightly smaller screens) that work with the M1 series.
-min.jpg "How to Make Custom Screen Printed T-shirts with xTool")
Step 1: Prepare the Screen
Begin by making sure the 6 levers on the frame are in the open position, face out, overhanging the edges of the frame.
Then insert one screen into the frame and using the 2 short and 2 long rods into the grooves on the frame.
They click in to place firmly.
The directions are easy to follow in the instructions that come with the screen printing tool kit.
-min.jpg "How to Make Custom Screen Printed T-shirts with xTool")
I didn't realize until I saw these pictures how I got my fingerprints all over it...thankfully this did not seem to make any difference with the final prints.
So click all 4 of the rods into place, tucking the screen tightly into the frame.
-min.jpg "How to Make Custom Screen Printed T-shirts with xTool")
After installing the screen rods, pull the levers to tighten the screen inside the frame, then remove the cardboard backing.
It has 4 pieces of adhesive holding it in place, one on each edge, so just gently pull and lift up those pieces of adhesive.
I pretty much shredded up that cardboard and took it out in pieces.
-min.jpg "How to Make Custom Screen Printed T-shirts with xTool")
Step 2: Prepare the xTool Laser Cutting Machine
Now install the mounting frame in the laser cutting machine on the right side of the machine.
Just unscrew the screws and fit the mount in there and put the screws back in the same place, through the mounting frame.
I originally installed mine on the left side and it did not work right, so make sure it's the right side.
-min.jpg "How to Make Custom Screen Printed T-shirts with xTool")
Then the screen frame, with the installed screen, slides on the newly screwed in mounting frame on the right side of the machine, with the screen side up.
The honeycomb riser needs to be removed for this process.
-min.jpg "How to Make Custom Screen Printed T-shirts with xTool")
Step 3: Image and Engraving
Design your screen printing image and import it into xTool Creative Space, edit it to fit the size of your screen. If it's your first time to screen print, start with just one color images.
THEN BE SURE TO MIRROR THE IMAGE SINCE IT WILL ENGRAVE THE BACK OF THE SCREEN.
Select the laser type as "Screen Printing" and select the material as "Mesh Screen", then auto adjust the distance (or set it to 0.718).
The xTool will set the auto engraving settings after selecting the material.
Then send the image to the machine.
It takes a bit longer to process, and then the laser begins engraving the layer of emulsion off the screen. Again, it's a lengthy process to engrave.
It's beautiful and precise, leaving immaculate details...and a bit smelly, so make sure it is venting out a window.
The engraving process takes a very long time, so stay close and be patient.
-min.jpg "How to Make Custom Screen Printed T-shirts with xTool")
To make extra use of this screen, I engraved 2 images on it, it's the perfect option for cost effectiveness--it's the most economical way to use a screen.
It's easy to use just one print at a time by covering one with parchment, freezer paper or butcher paper and masking tape.
Thus, 2 in one on this screen! Again, the image is reversed on the back of the silk screen.
-min.jpg "How to Make Custom Screen Printed T-shirts with xTool")
I have 2 phrases that I wanted to look distressed and I love that screen printing can do a distressed look and detailed designs!
Goodness and Mercy & Jesus loves you!
I can use this screen over and over for as many prints as I want.
This is perfect for family reunions, summer camps, corporate events--any reason to make a bunch of matching shirts or business merch! Just a few basic steps for this popular method for screen printing.
-min.jpg "How to Make Custom Screen Printed T-shirts with xTool")
Step 4: Inking Shirts
Now it's time to slide the screen into the screen printing press.
Install the wood table top piece and adjust the screen on the table top surface with the knobs on the screen printer.
Open up the special inks and stir it with the spatula.
-min.jpg "How to Make Custom Screen Printed T-shirts with xTool")
Then apply a little bit of paint on the screen, above the engraved image.
Then lift the screen up a bit, so it is not touching the table.
Use the screen printing squeegee and squeegee the paint down the screen twice to get it ready for printing.
Place a piece of paper on the table top and do a test print on paper before doing a tee shirt.
-min.jpg "How to Make Custom Screen Printed T-shirts with xTool")
The easiest way to squeegee the screen is to hold the frame with the non-dominate hand and holding the squeegee with the dominate hand.
Pull towards yourself with the squeegee, this will smoothly roll the paint over the screen and a thin layer of water-based paint will fill the image area and print it perfectly on the surface below it.
-min.jpg "How to Make Custom Screen Printed T-shirts with xTool")
The xTool squeegee has a magnet and it sticks perfectly to the screen print frame, and makes it easy to lift the frame after the swipes of paint.
-min.jpg "How to Make Custom Screen Printed T-shirts with xTool")
Okay so 2 swipes of the squeegee is about all it needs, unless the ink is running out.
You can always lift up the frame and check and then set it back down, just don't shift the shirt or item you are screen printing.
This is a fantastic way to make sure your prints are always perfect.
-min.jpg "How to Make Custom Screen Printed T-shirts with xTool")
Then lift up your own screen to reveal the print!
I love practicing my prints on paper!
If satisfied with the test print, set up a shirt and line it up so the neck is the right direction with the collar about 2 inches from the image.
-min.jpg "How to Make Custom Screen Printed T-shirts with xTool")
It's easy to repeat the print method process with the second simple design on the screen.
Just cover with paper, parchment, etc. and tape it in place.
Then add the black ink in a line across the top of the frame and swipe down to the taped off section.
-min.jpg "How to Make Custom Screen Printed T-shirts with xTool")
Printed images need about 30-45 minutes of drying process time.
You can use a hair dryer, or a flash heater, but it's not necessary...xTool's ink will dry over time and doesn't need to be heat set.
Check the specific type of ink you are using for the detailed drying instructions.
-min.jpg "How to Make Custom Screen Printed T-shirts with xTool")
The beauty of DIY screen printing project making is that you can use the screen repeatedly.
You can print on a canvas tote bag, tea towels, even things that are much thicker, since the screen can be raised up quite a bit!
-min.jpg "How to Make Custom Screen Printed T-shirts with xTool")
xTool has thought of everything in making this screen printing process super convenient and easy to use.
It's such a fun element to a creative business, side hustle or just for personal use.
-min.jpg "How to Make Custom Screen Printed T-shirts with xTool")
Step 5: Clean Up
Cleaning up is relatively easy.
Simple use the spatula to scrape off the squeegee and put the excess ink back in the container (unless it's been mixed with other colors).
Wipe the tools off on a paper towel.
Then take the tools to the sink and clean them off.
The ink is water-based ink and will clean off in warm water, but no soap needed.
Then place the screen right into the sink (thank you for a utility sink) and spray it off.
I use a fine scrubber to clean off the silk screen and remove all the paint.
Then set on a towel and dry off.
Now the screen can be used again and again...different colors on different items!
-min.jpg "How to Make Custom Screen Printed T-shirts with xTool")
Look at all these fabulous prints!
I love how they turned out--I love the distressed look of these.
There is a couple mistakes...there was a line of paint that dried and made it so that there was a spot that the paint did not adhere...but it's an easy fix for the future.
-min.jpg "How to Make Custom Screen Printed T-shirts with xTool")
So much goodness and mercy!
I love the black ink on the black shirt--that's absolutely my style!
It's so easy to screen print, I can't wait to do more--I have so many more ideas!
-min.jpg "How to Make Custom Screen Printed T-shirts with xTool")
That's it!
Now having a full color screen printing shop in your own home is absolutely easy and fun!
xTool offers the multi-color silk screen kit and has everything you need (with your laser cutter) to make high quality screen prints.
I've got more fun posts to come using this screen printer!
Like, Pin and Save!

Check out these other crafts made with xTool!
There are so many amazing things this machine is capable of!
How to Engrave Stainless Steel with 2W IR Laser DIY
Turn a love letter signature into a heirloom keepsake!
Learn how to engrave stainless steel pendants with the xTool S1 2W infrared laser.
Think of all the handmade and personalized gifts you can make with this amazing technique!
These are gorgeously engraved permanent marks and will not wipe off...turn your handwriting into a treasure.
-min.jpg)
How to Laser Engrave Journals DIY with xTool S1
Learn how easy it is to make a laser engraved journal or notebook with xTool laser cutting machine.
Every time I do a laser cutting project it becomes my absolute favorite--and this is no exception, I totally love these faux leather engraved journals!
Engraving on journals is so fast, just minutes, and makes a gorgeous handmade gift, branded business merchandise or custom swag.
-min.jpg "Supplies Needed for Laser Engrave Journals: affiliate links: OtterBlotter Hardcover Lined Journal Notebook xTool S1 diode laser (or other laser engraving machine) xTool Creative Space Image to engrave")
Make a Laser Cut Earring Holder DIY with xTool S1
Learn how to make a gorgeous DIY earring display perfect for keeping track of earrings or for displaying earrings for sale at an event!
If you have a big earring collection there are so many wonderful earring stand options--even combining with jewelry organizer solutions too!
-min.jpg "Learn how to make a gorgeous DIY earring display perfect for keeping track of earrings or for displaying earrings for sale at an event!")
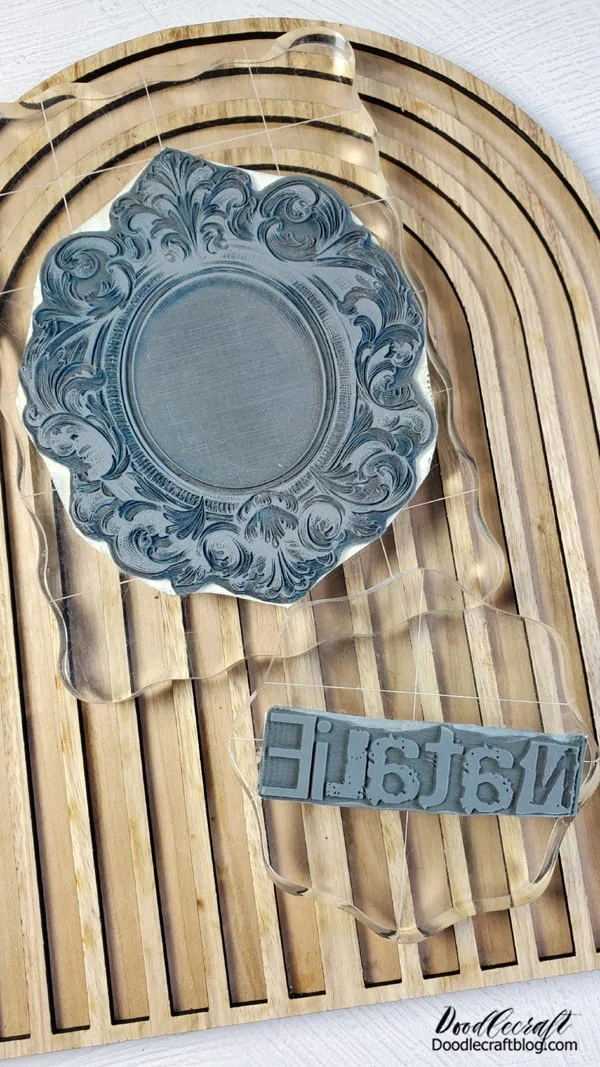
How to Make Rubber Stamps with xTool S1 Laser Cutter
Learn how to make your own custom rubber stamps with the xTool S1 Laser cutting and laser engraving machine!
I am absolutely addicted to making rubber stamps now and you will be too--they are super intricate and detailed, I'm in love!
-min.jpg)
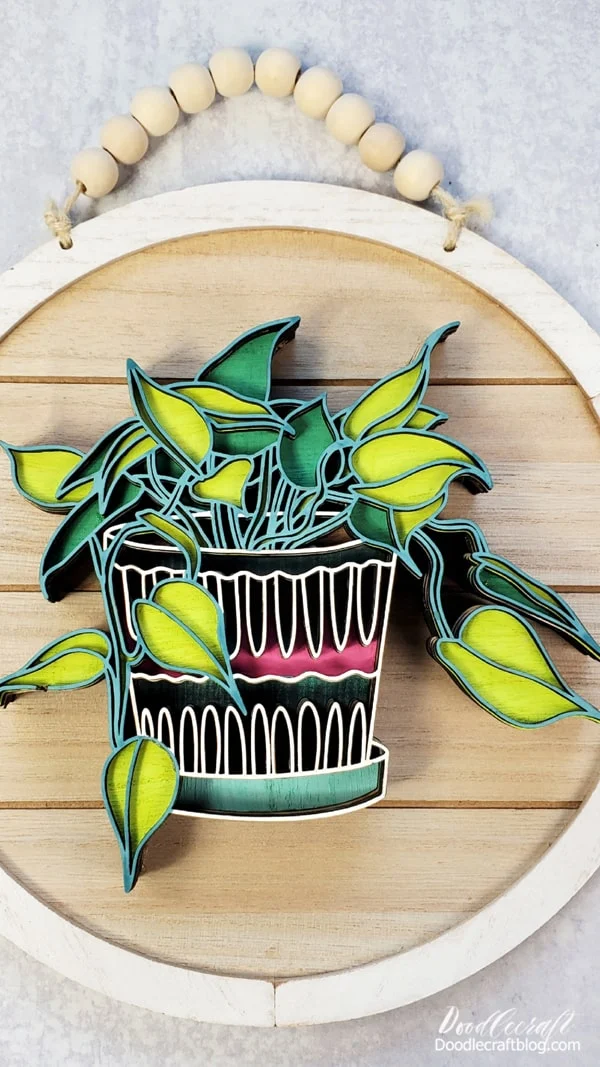
Layered Laser Cut Wood Sign with Tooli-Art Paint Pens
Layered laser cut wood signs are beautiful, fun to make, and totally the thing right now!
The intricate cuts of a laser cutter make it possible to stack very delicate layers into a work of art easily and making it not quite so delicate.
The depth, texture and colors make this little planter sign so intriguing!
-min.jpg "Layered Laser Cut Wood Sign with Tooli-Art Paint Pens")
Learn how to make stunning leather bracelets with the xTool Laser Cutting machine.
It's easy to make laser cut leather bracelet and makes a meaningful gift for a special occasion!
These wrap-around wrist bracelets are easy to make and secure with a stud rivet...they are adjustable in size, can be customized and only take 3 supplies!
-min.jpg "Learn how to make stunning leather bracelets with the xTool Laser Cutting machine. It's easy to make laser cut leather bracelet and makes a meaningful gift for a special occasion! These wrap-around wrist bracelets are easy to make and secure with a stud rivet...they are adjustable in size, can be customized and only take 3 supplies!")
DIY Laser Engraving a Mirror with xTool S1 20W Diode
Engrave a mirror with the xTool S1 Laser Cutting machine for a gorgeous statement piece of home decor.
Add an inspirational message or family motto on a mirror with glass laser engraving!
The possibilities with the xTool electronic products are endless!
-min.jpg "Add an inspirational message or family motto on a mirror with glass laser engraving!")
Acrylic Monstera Leaf Earrings
Cut acrylic with a diode laser and make earrings!
Diode lasers can cut cast acrylic in specific colors...not clear, white or blues.
Black acrylic cuts best--so smooth and dreamy!
-min.jpg)
Beauty Leather Bracelet
Learn how to make an engraved leather bracelet with the xTool M1 Laser Cutting Machine.
This stunning bracelet is the perfect custom gift to make for Mother's day, and took less than 5 minutes from start to finish!
-min.jpg)
Happiness Calligraphy Sign
Hand written laser cut outs are my favorite thing!
Nothing is quite as awesome as seeing your own artwork, hand lettering, family name or your artistic touch come to life.
Using an iPad is an easy way of saving off artwork in a useable file, like svg files, and sliding it directly into xTool Creative Space (XCS).
-min.jpg)
Make a layered Snow Globe Scene
Layered laser cut wood is the trending laser cut craft of choice.
Adding multiple layers of delicately lasered basswood makes all those precise designs stand out.
You can take the time to paint the layers or put kits together for a great product for consumers to paint and assemble!
-min.jpg "How to Make a Layered Snowglobe Scene Learn how to make a layered snowglobe scene using a laser cutting machine and wood sheets. I am having so much fun using my new xTool laser cutter. It's easy to set up and can cut all sorts of materials. Today I'm sharing these cute little layered snowglobe scenes and how simple they are to create.")
How to Make Nursery Name Sign (Custom DIY with xTool)
Learn how to make a gorgeous nursery name sign for a new bundle of joy!
Make a name sign for any occasion, not just a new baby...change the text for a wedding, family name or with a fun saying.
This wood sign is perfect for customizing with a first and middle name, and looks great as home decor.
-min.jpg "How to Make Nursery Name Sign (Custom DIY with xTool)")


-min.jpg)


Comments